Microsoft 365 Step-By-Step Guide Buying a domain and setting up business email
This guide will take you through each step from signing up with Microsoft 365, buying your domain through the Office portal and creating your first email mailbox.
There are three steps involved in getting your Microsoft 365 business email ready for you to use which we will cover here.
- Create an Microsoft 365 tenant (that's the account for your business).
- Buy your business domain
- Setup your first email
If you get stuck anywhere, feel free to reach out via our support chat on the bottom right and we'll try to help you along.
1. Creating your Microsoft 365 tenant
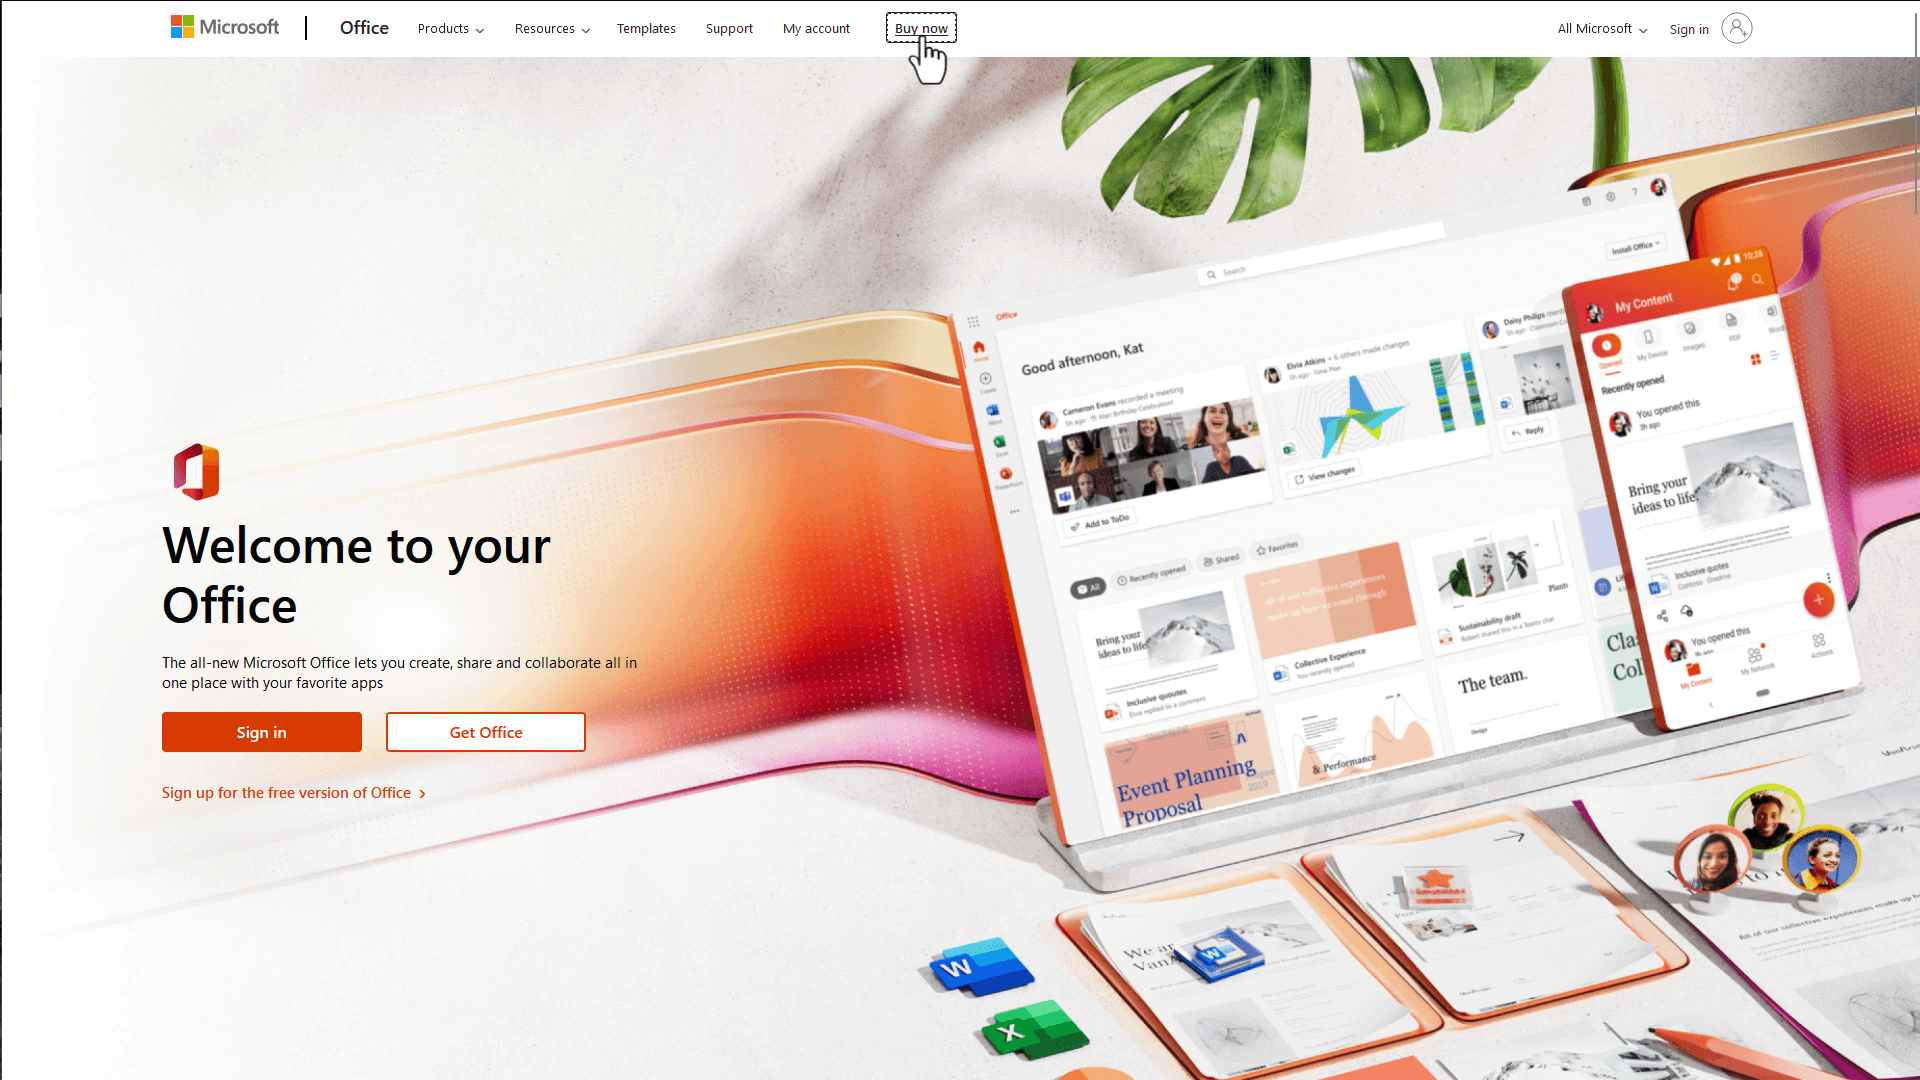
Click here to open the Microsoft 365 homepage in a new tab. Keep this tab open and switch in-between for each step.
Click on "Buy now" at the top.
As you will be using Microsoft 365 for business email select the "For business" tab.
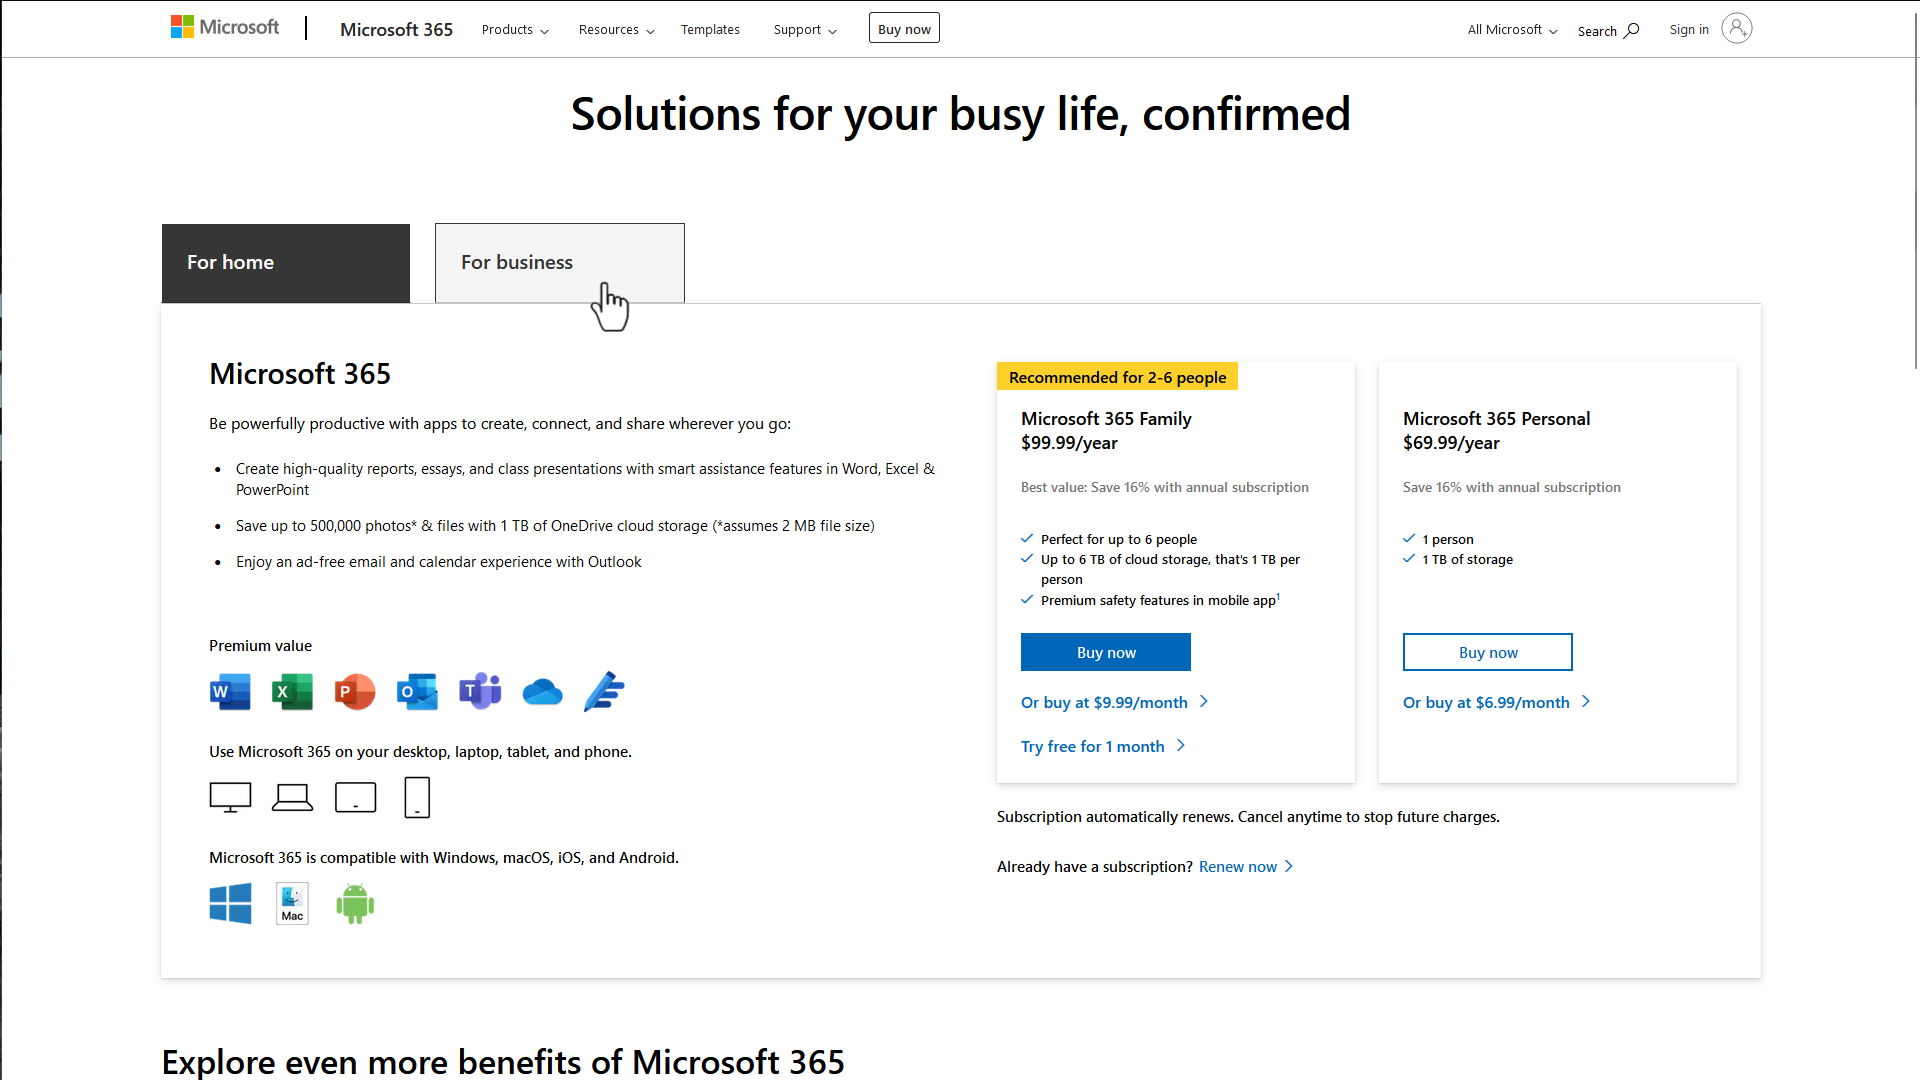
Microsoft 365 offers a number of plans. To start you will purchase the smallest plan. Don't worry though you can upgrade later if you need more services.
Under the heading "Microsoft 365 Business Basic" select the "Buy now" button.
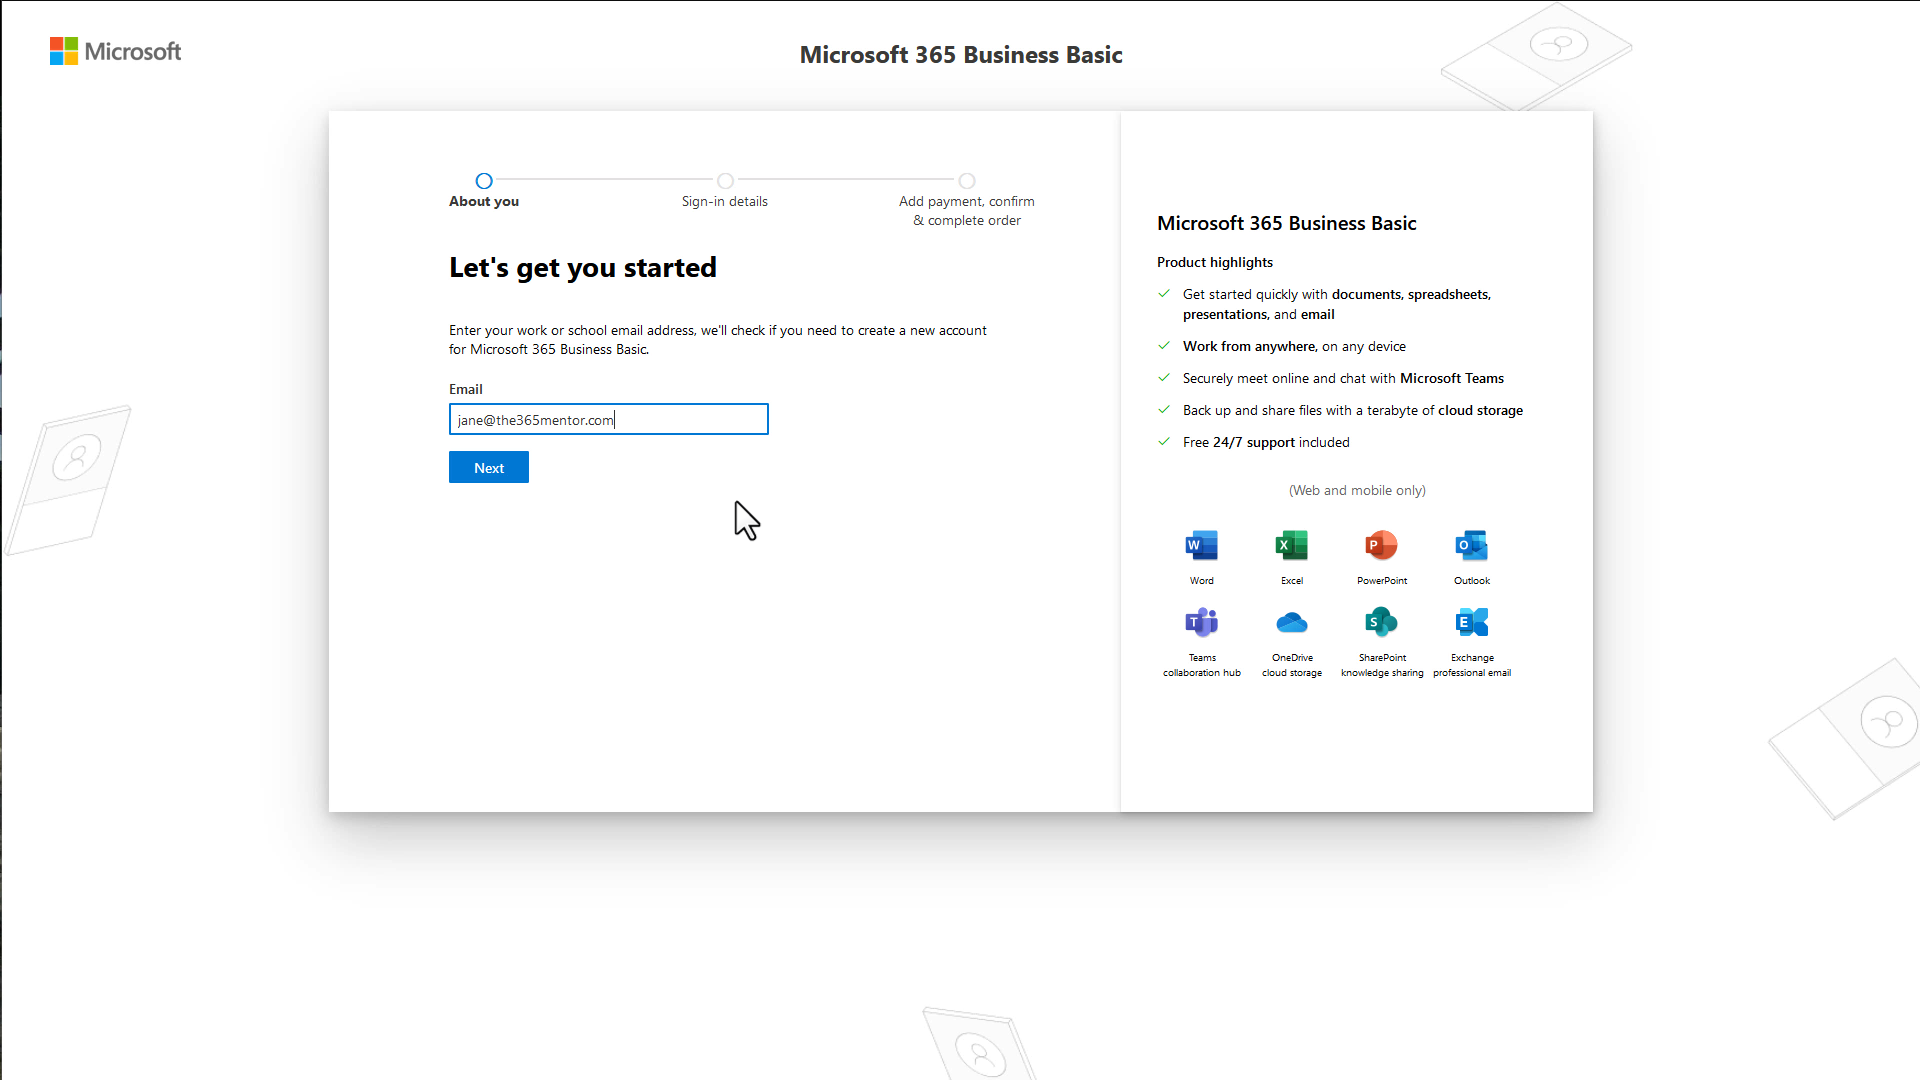
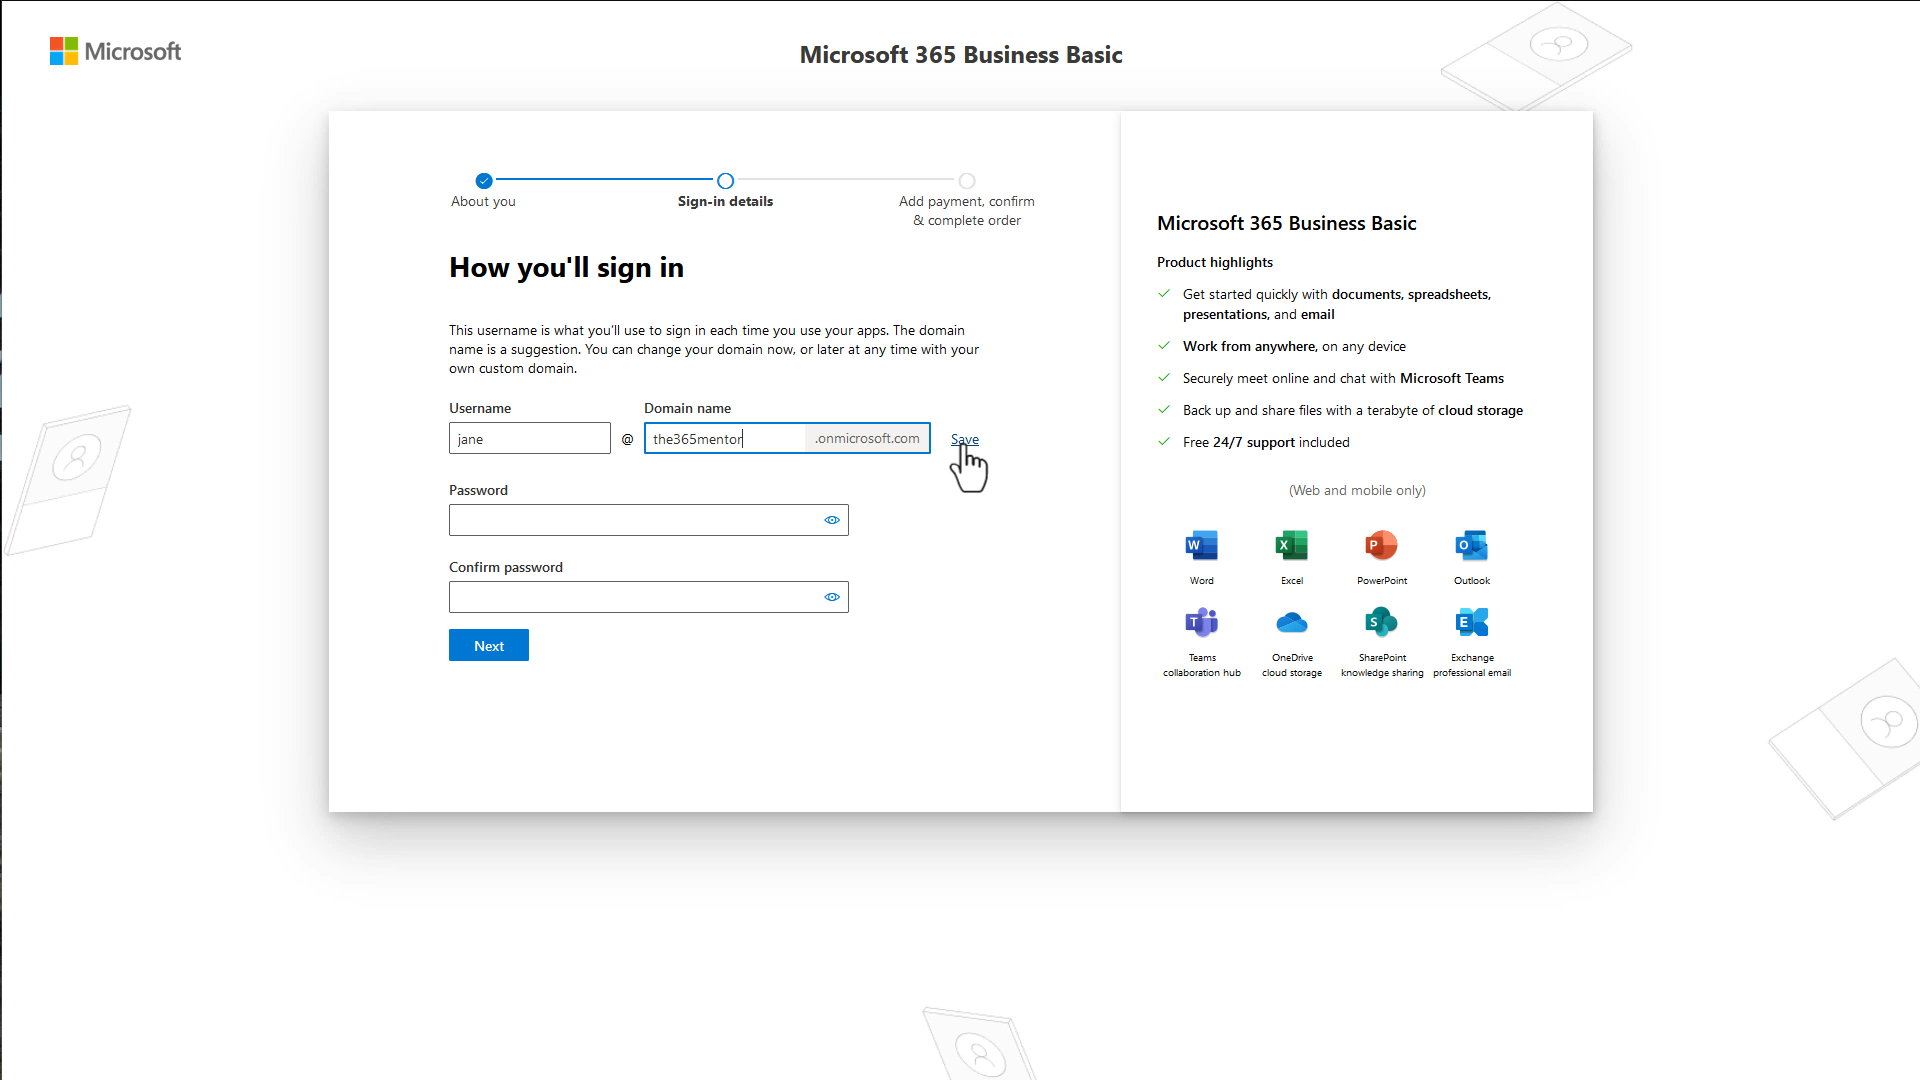
Email and personal information
Next you will be asked for the business email address you would like. If you haven't chosen a domain yet that is available to buy, read our guide to choosing a good professional business domain first.
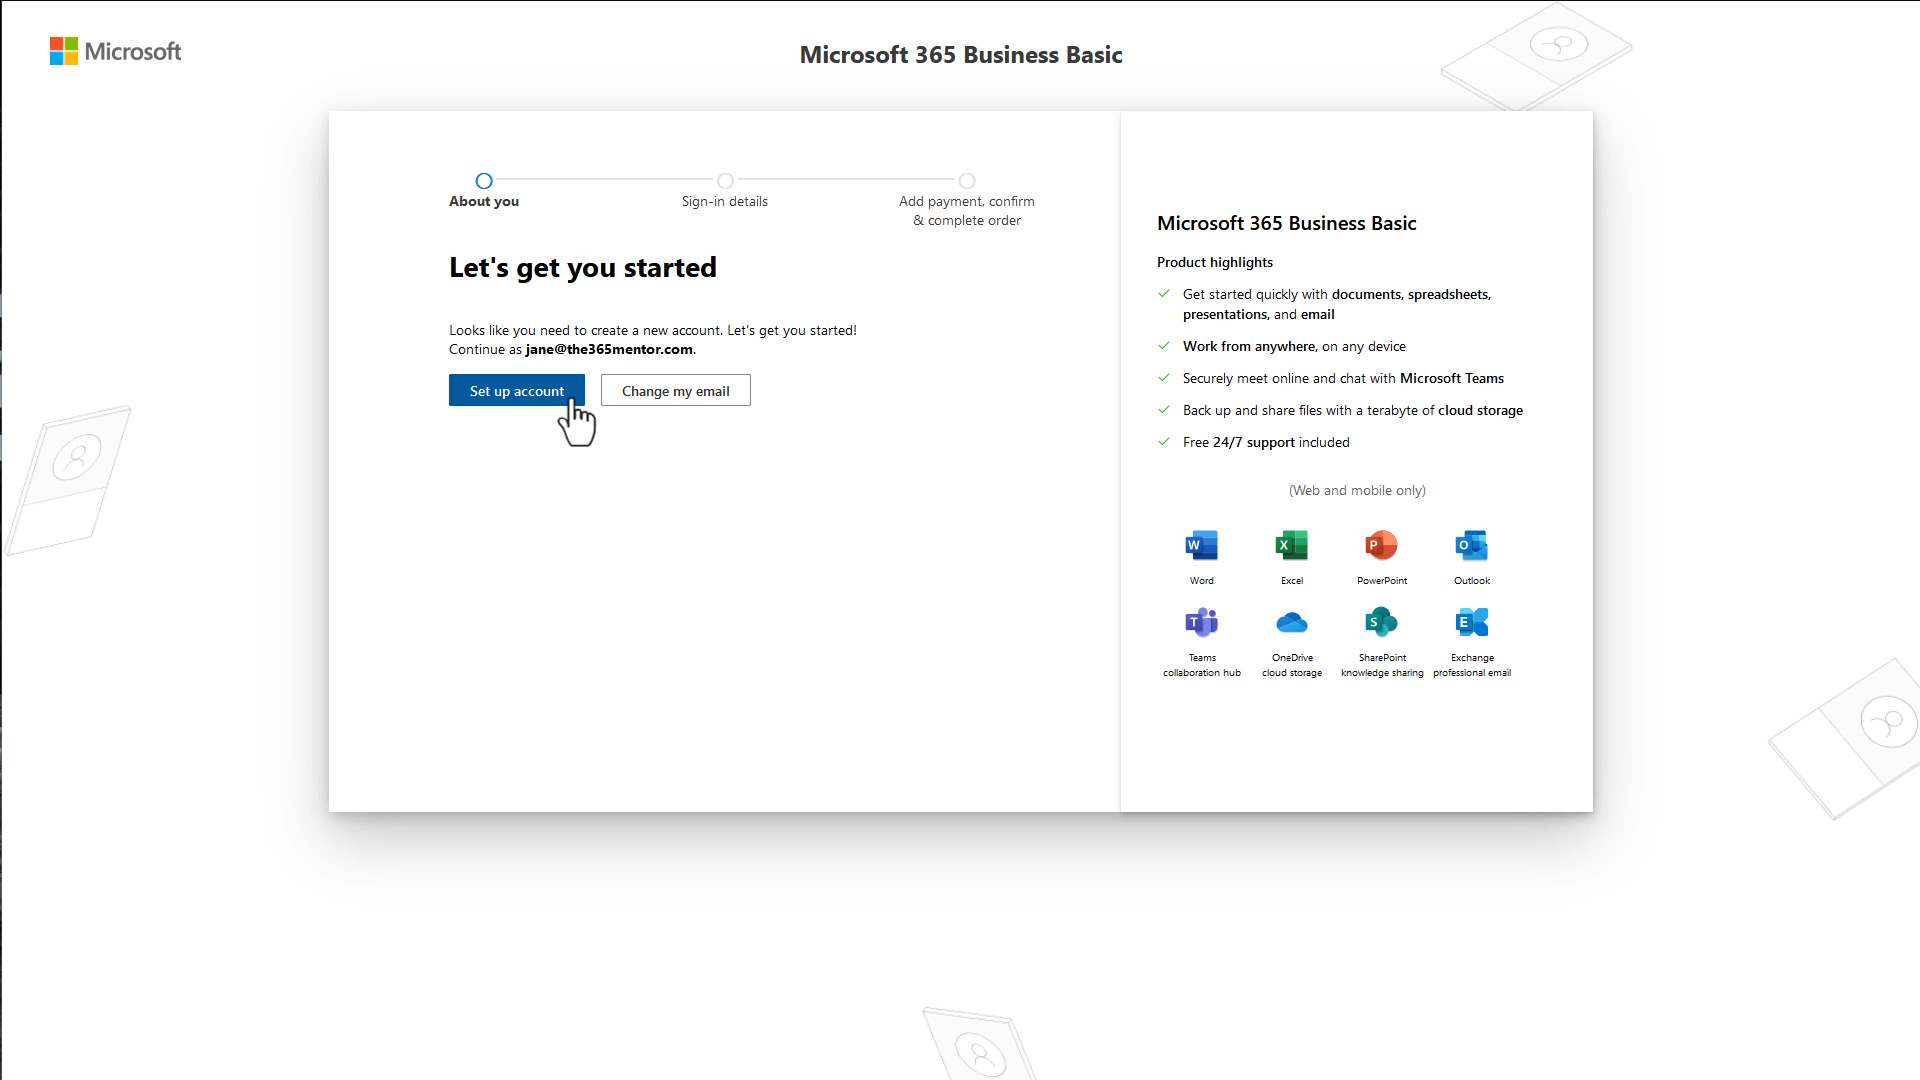
Type your first name, followed by the @ sign and then your domain name. In the picture you can see jane wants to use a domain called the365mentor.com, so she entered jane@the365mentor.com.
Then click the "Next" button.
On the next screen double-check you've typed your name and your domain correctly.
If you've confirmed, then click the "Set up account" button.
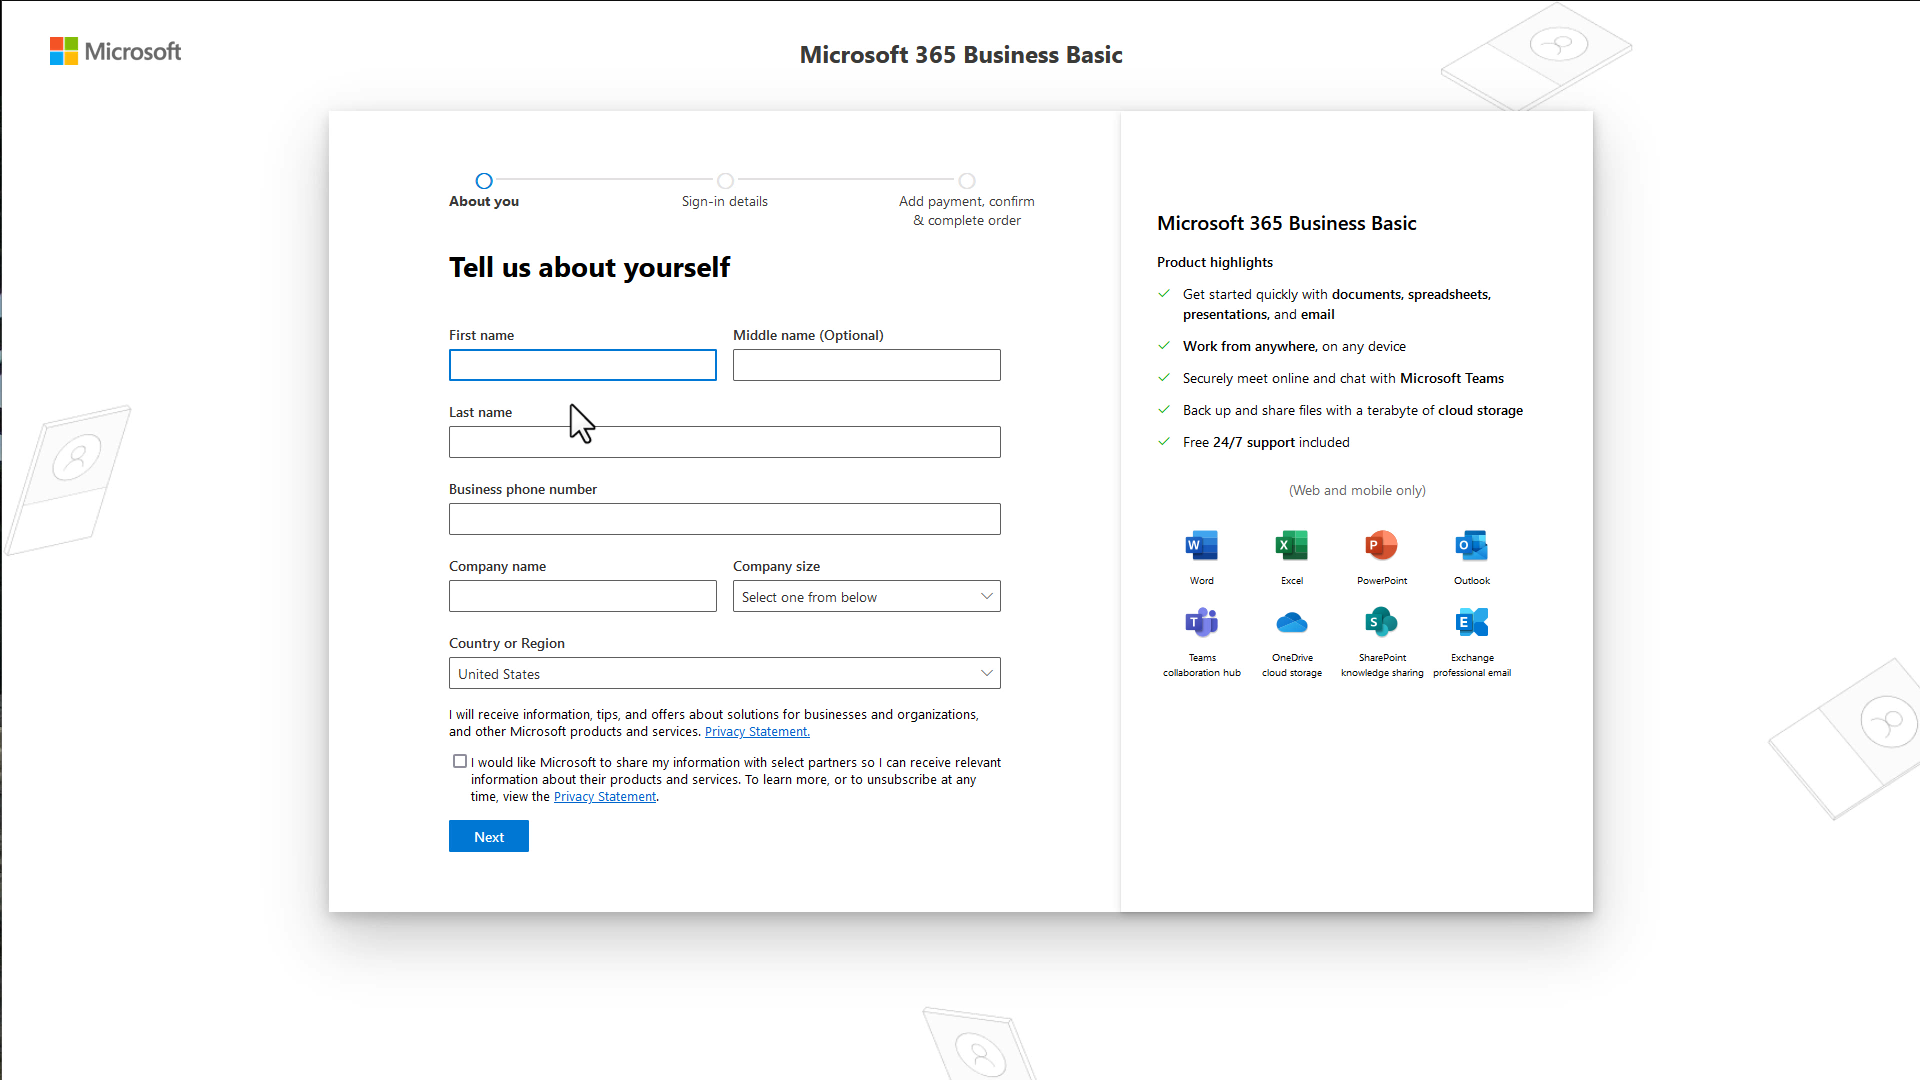
Next you will be asked for your personal and company information.
Enter the requested details and check the boxes if you agree with your data being shared or receiving promotional messages.
Then click the "Next" button.
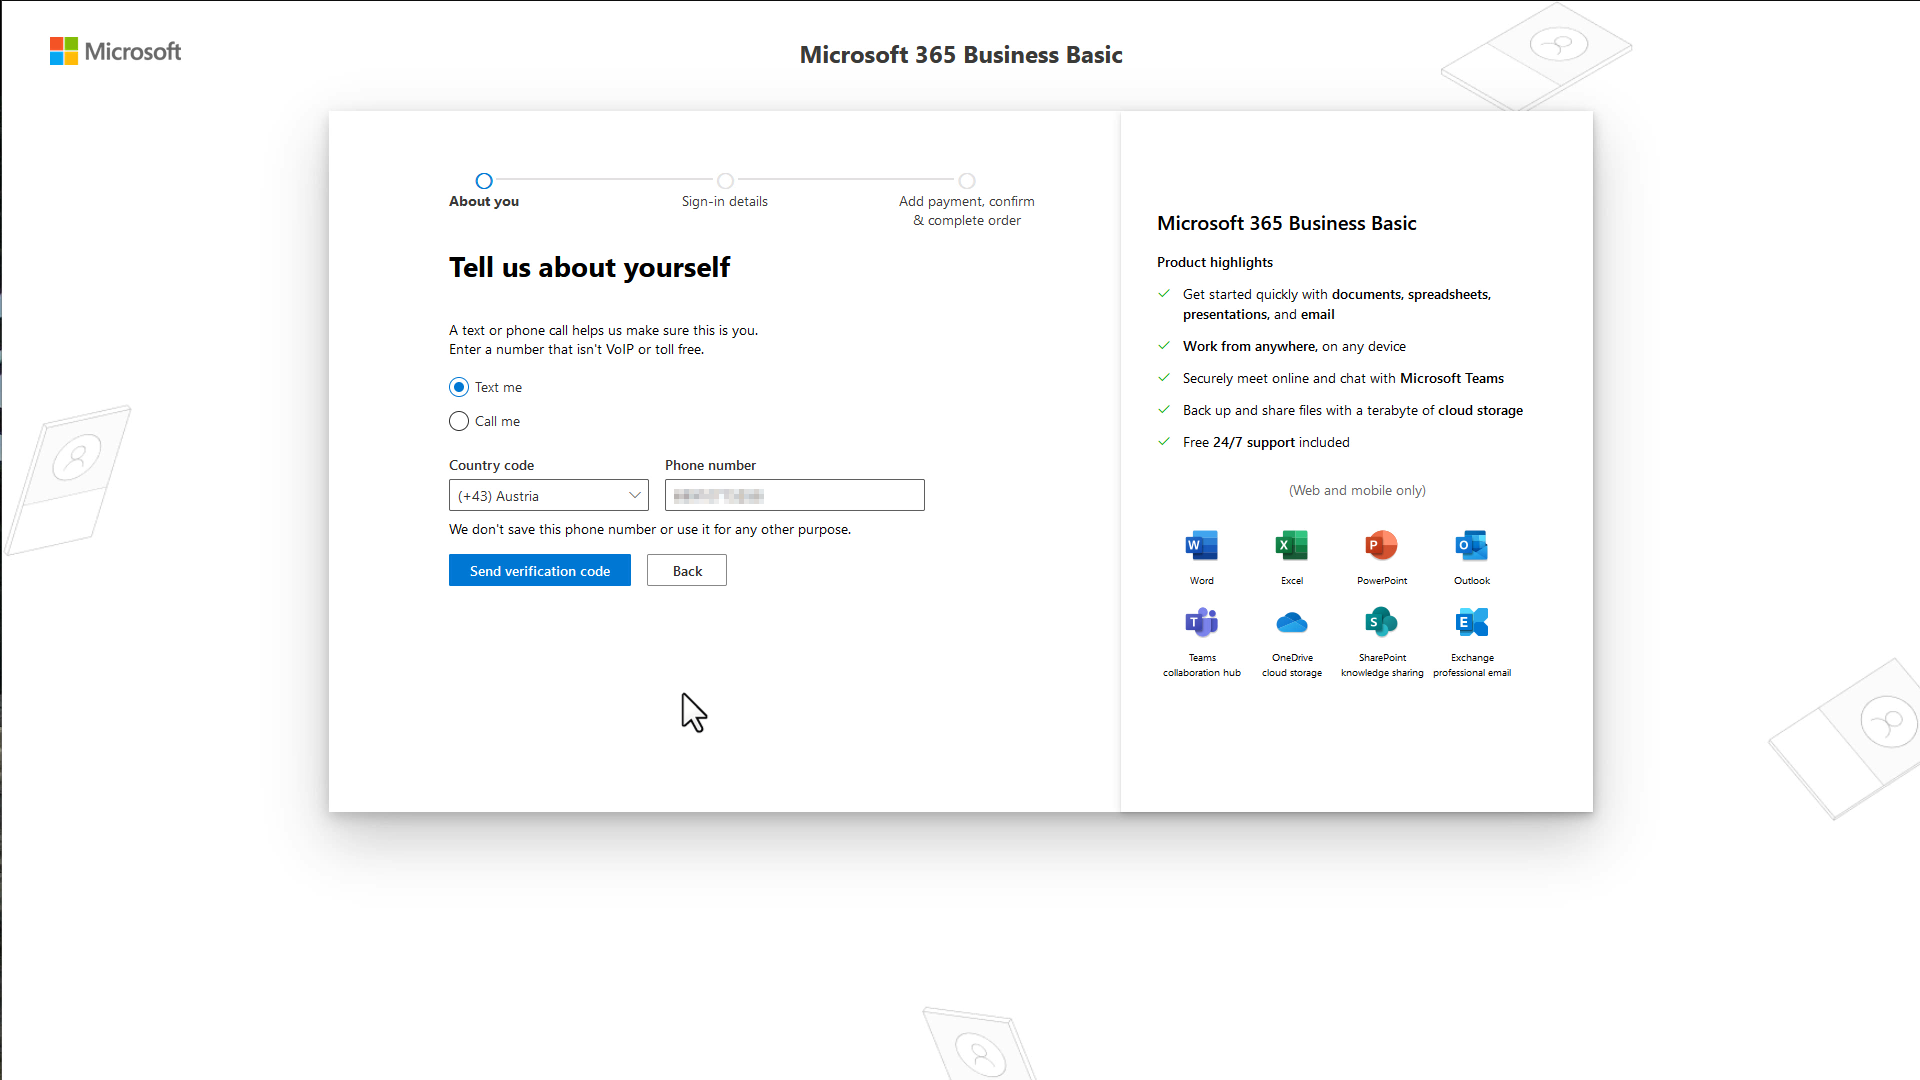
Microsoft 365 phone verification
Microsoft wants to verify that you are a real person for security reasons and will send you a text message or call you.
Choose the option you want, select your country code and enter your phone number.
Then click the "Send verification code" button.
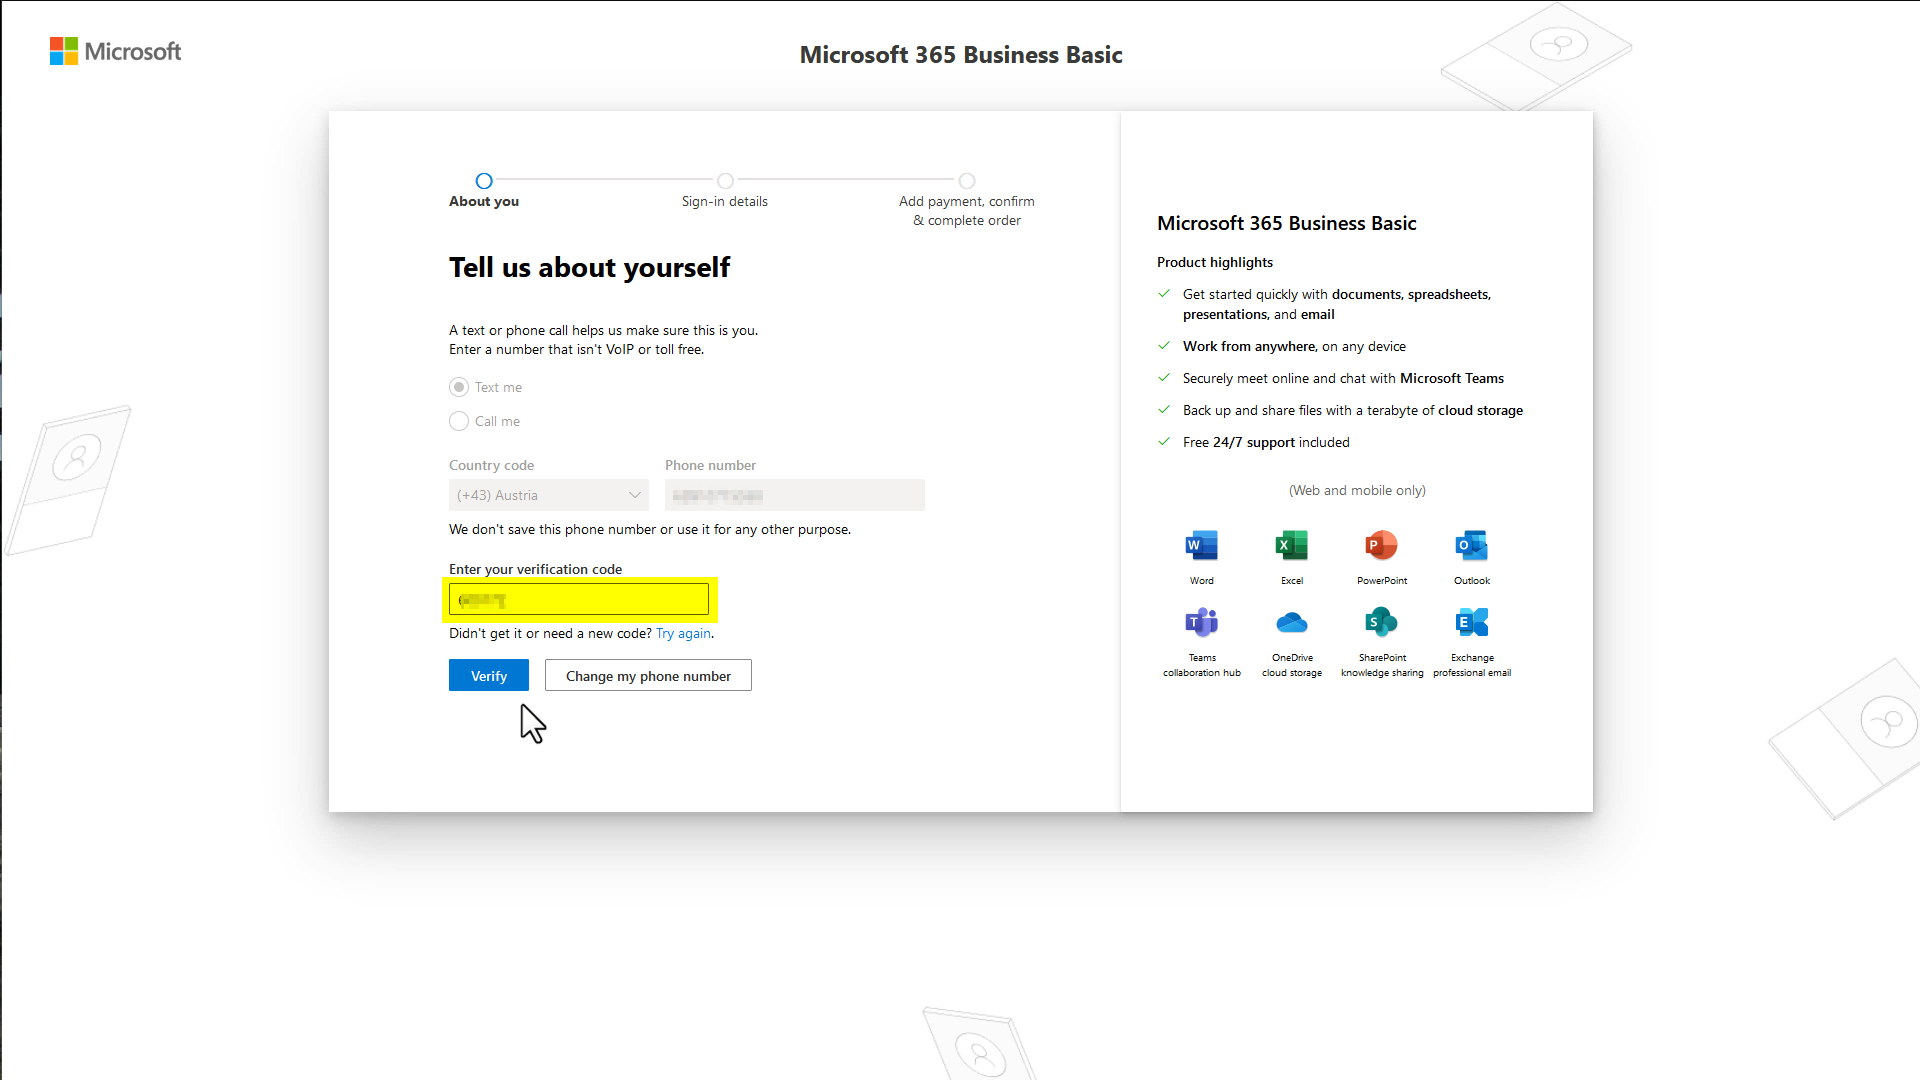
A new field will popup titled "Enter your verification code".
Wait for your phone to show you the text message. It will contain a 6 digit number that you enter into that field.
Then click the "Verify" button.
If the text message does not arrive, you can first try pressing "Try again" or if you have misspelled your phone number use "Change my phone number".
Temporary Username
Until you get to the step where you buy the domain you will need a temporary login. Microsoft will make a suggestion, but we recommend changing the username to your first name and leaving the domain name as Microsoft suggest.
First hit "Save", then enter a secure password. If you're not sure have a look at our guide on how to pick a good strong password for everyday use.
Important: Write down the temporary username on a piece of paper. You will need it in one of the next steps.
Then click the "Next" button.
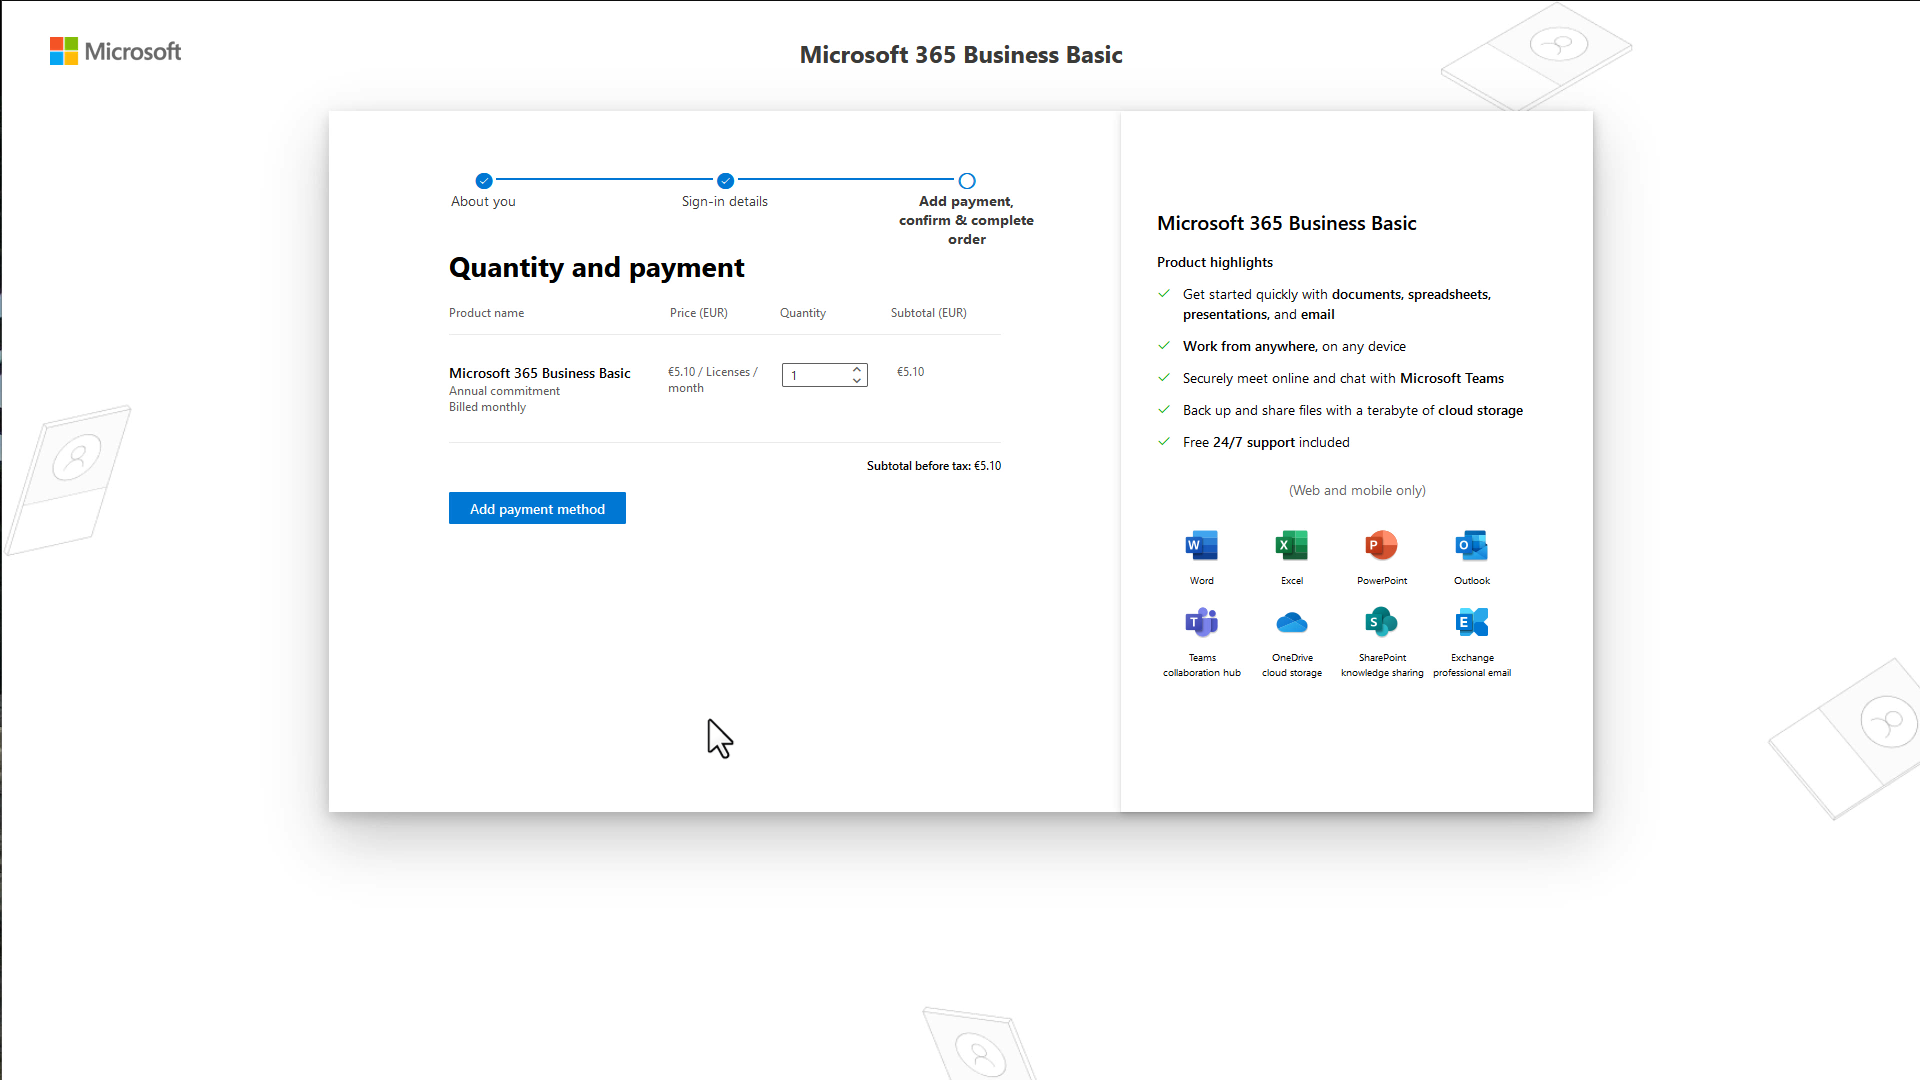
Payment
Now it's time to add your credit card information. The good news is, it will be the only time you need to do so in this guide. All services will be billed via Microsoft directly, so you always only have one company you're communicating with about billing.
Click "Add Payment Information" button.
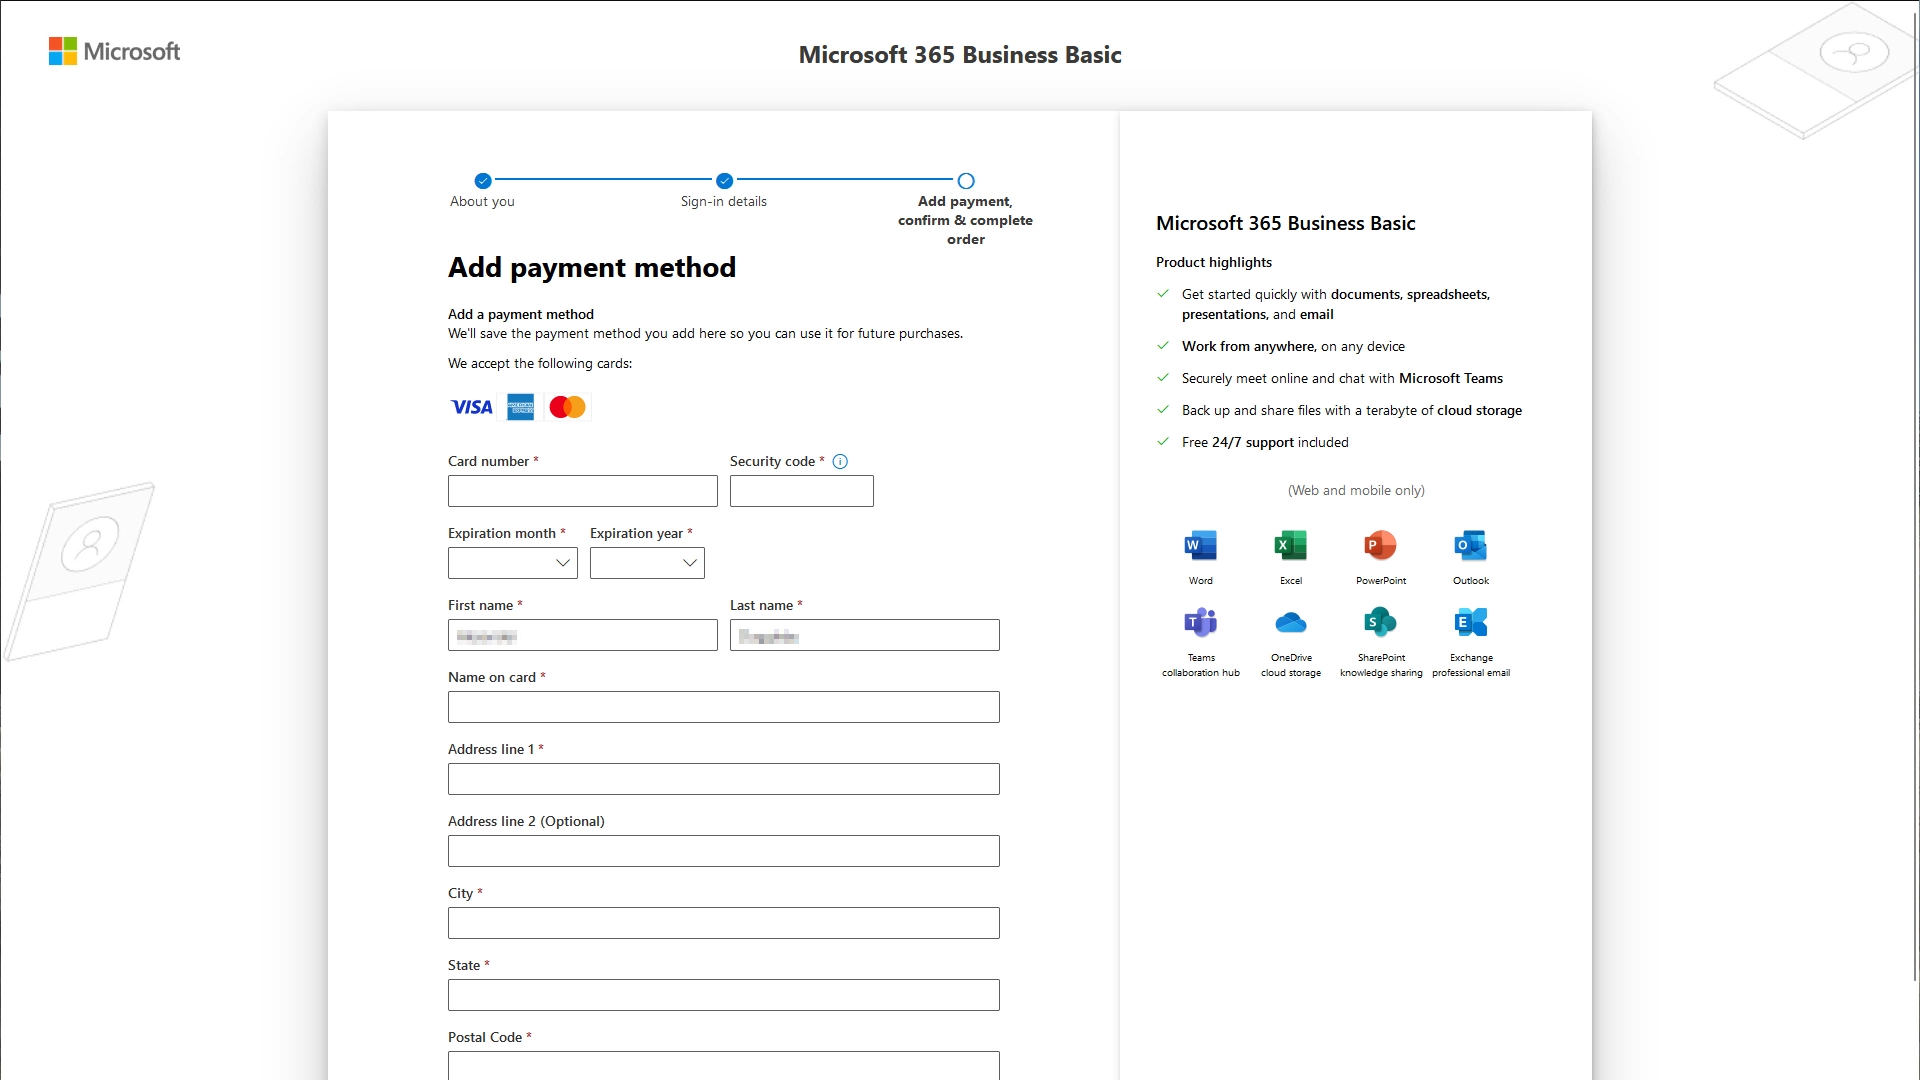
Enter your credit card information, business billing address.
Click the "Save" button.
The screen will then show you that you are about to buy one Microsoft 365 license and display the billing information.
If you are VAT-exempt you can add your tax id at this stage just below your "Sold-to address".
If everything looks in order, click the "Place order" button.

2. Buying your business domain in Microsoft 365
You will now be taken to your office admin portal.
On the left click the "Show All" menu item.
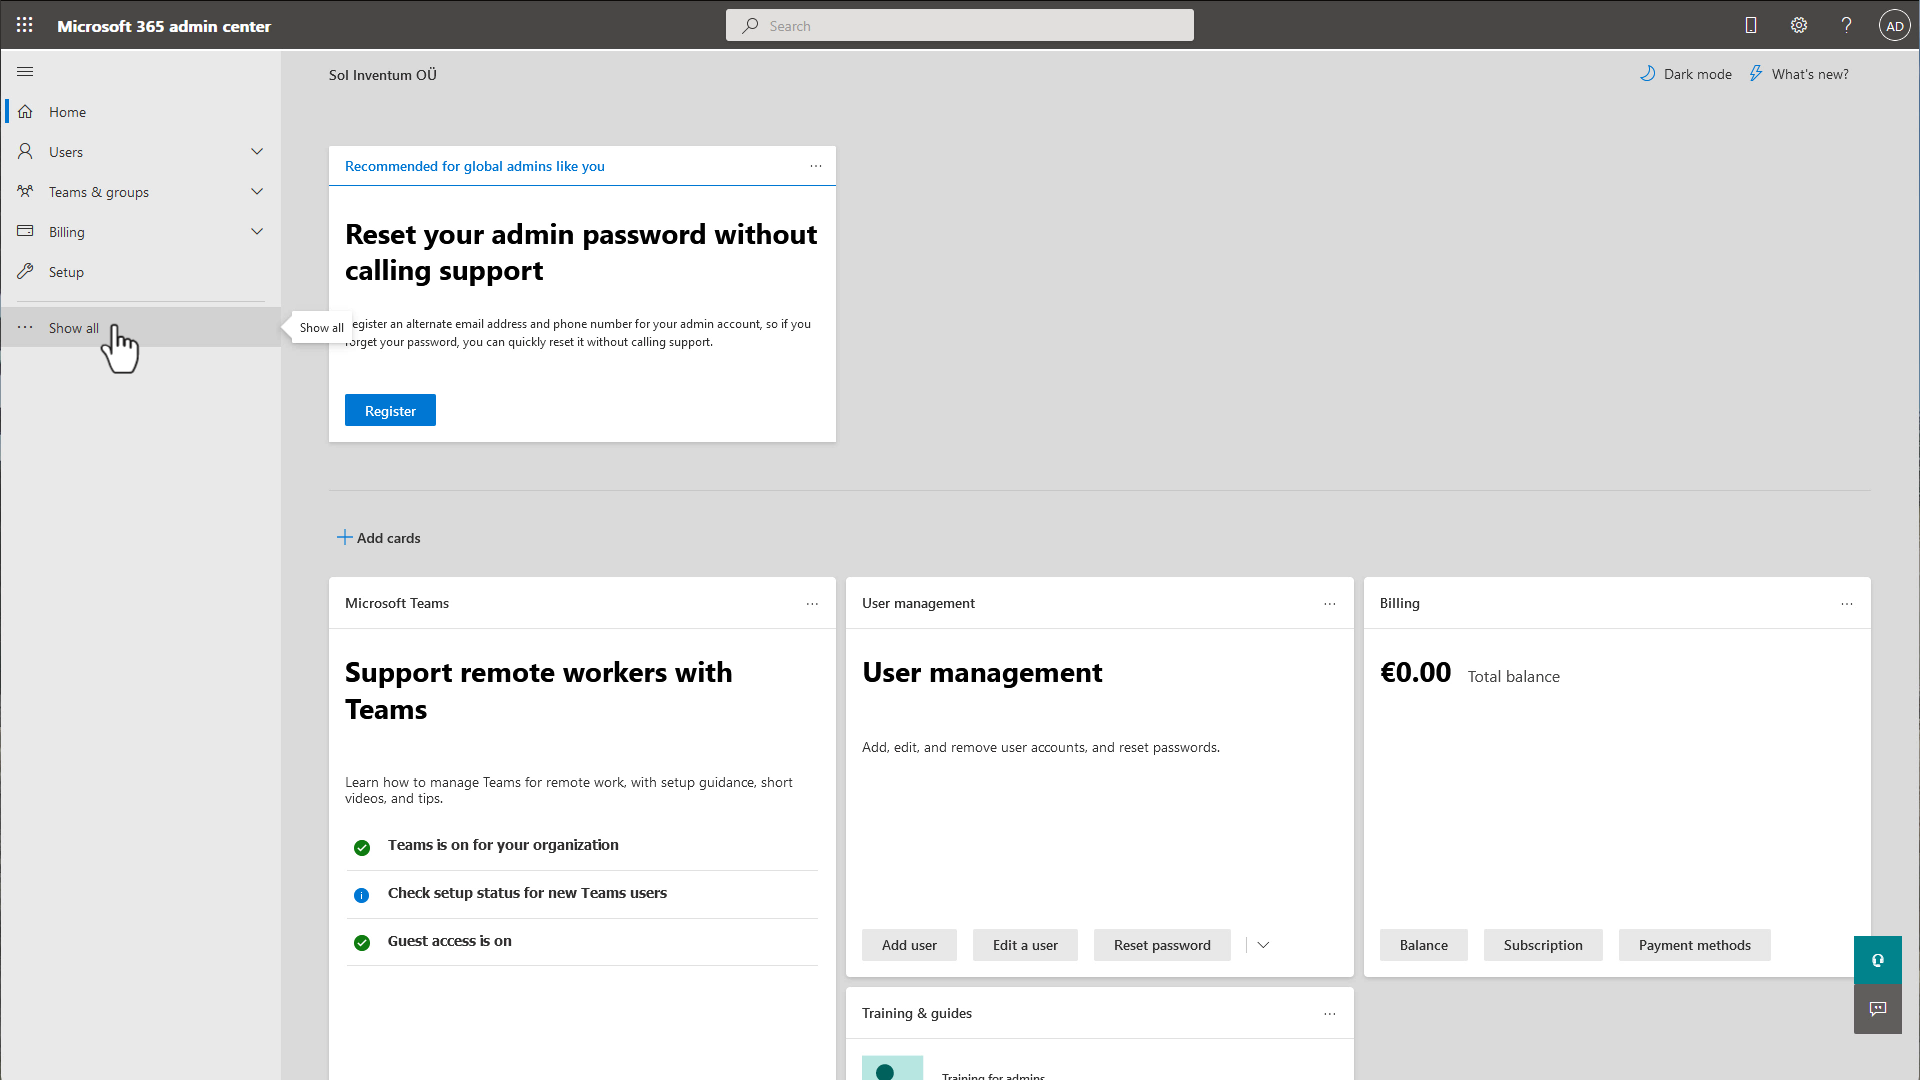
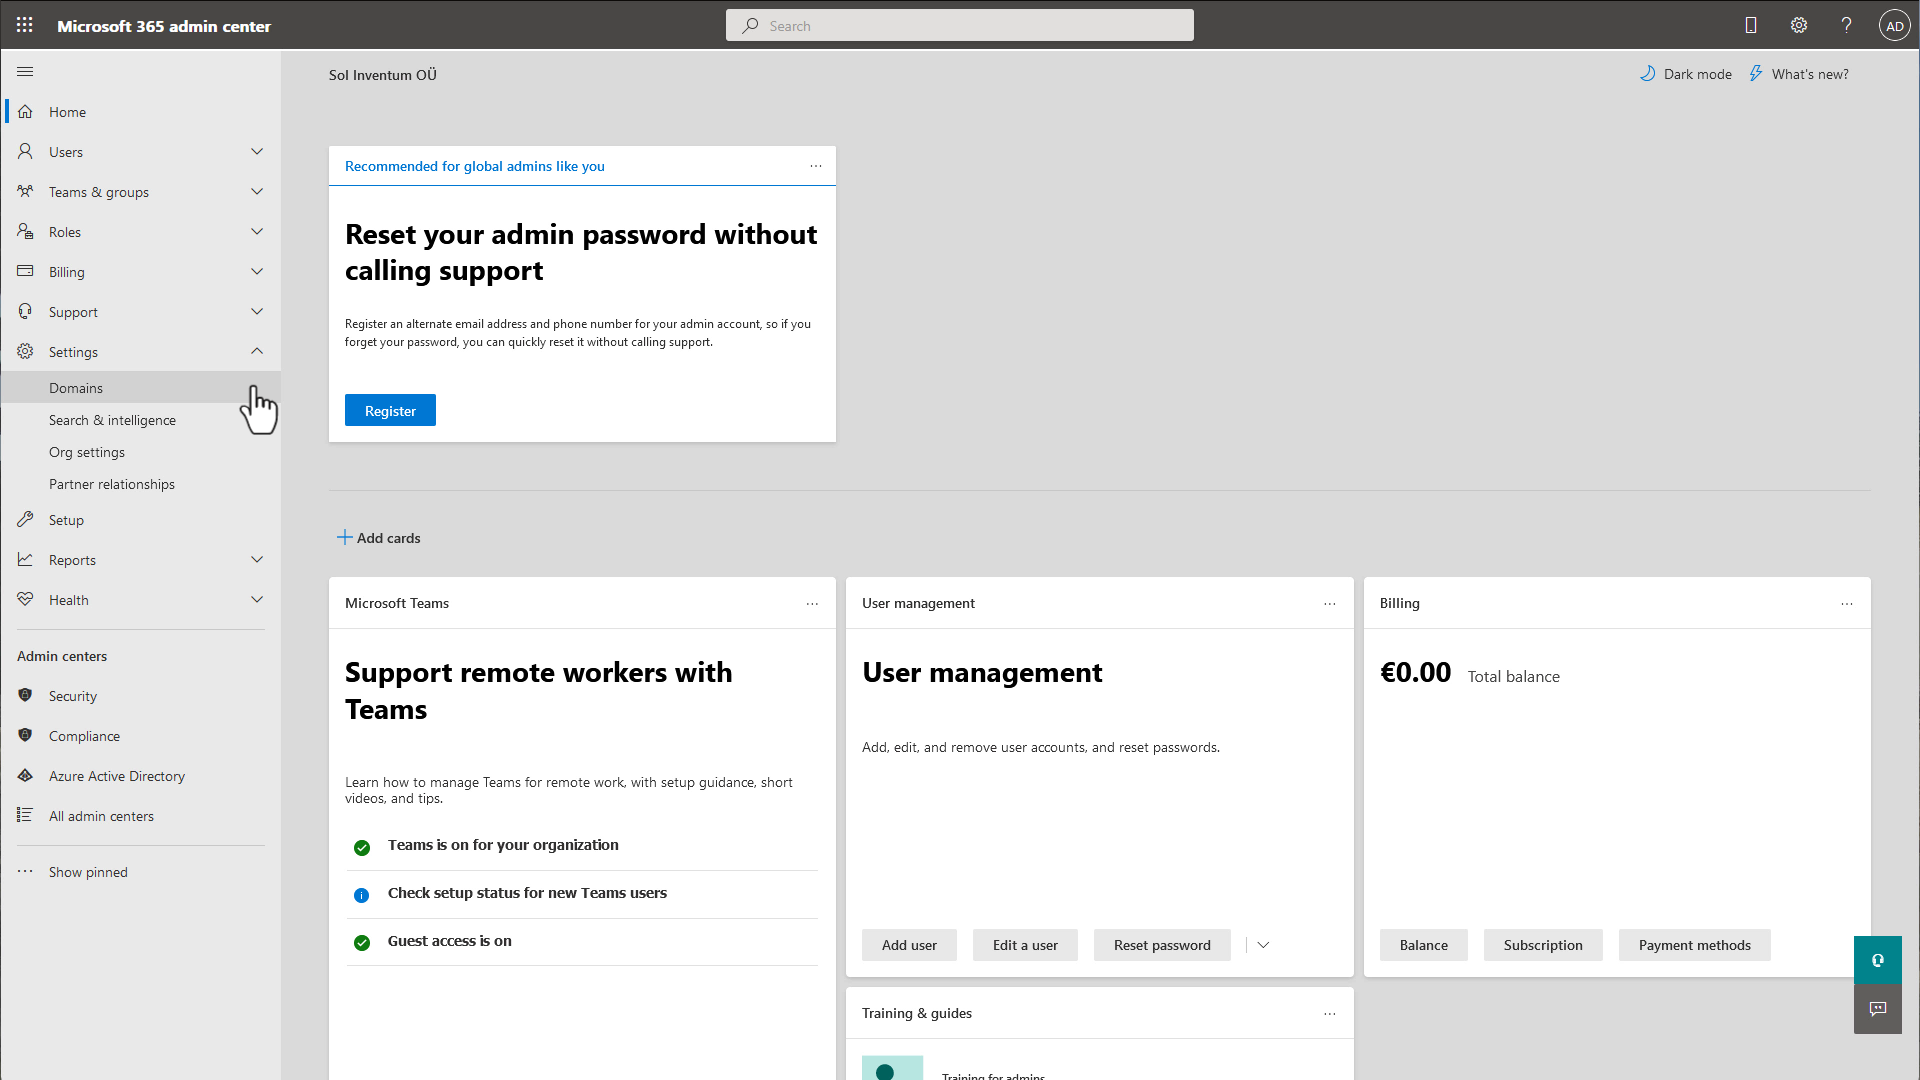
The menu will expand. Further expand it by clicking on the little down arrow under "Settings".
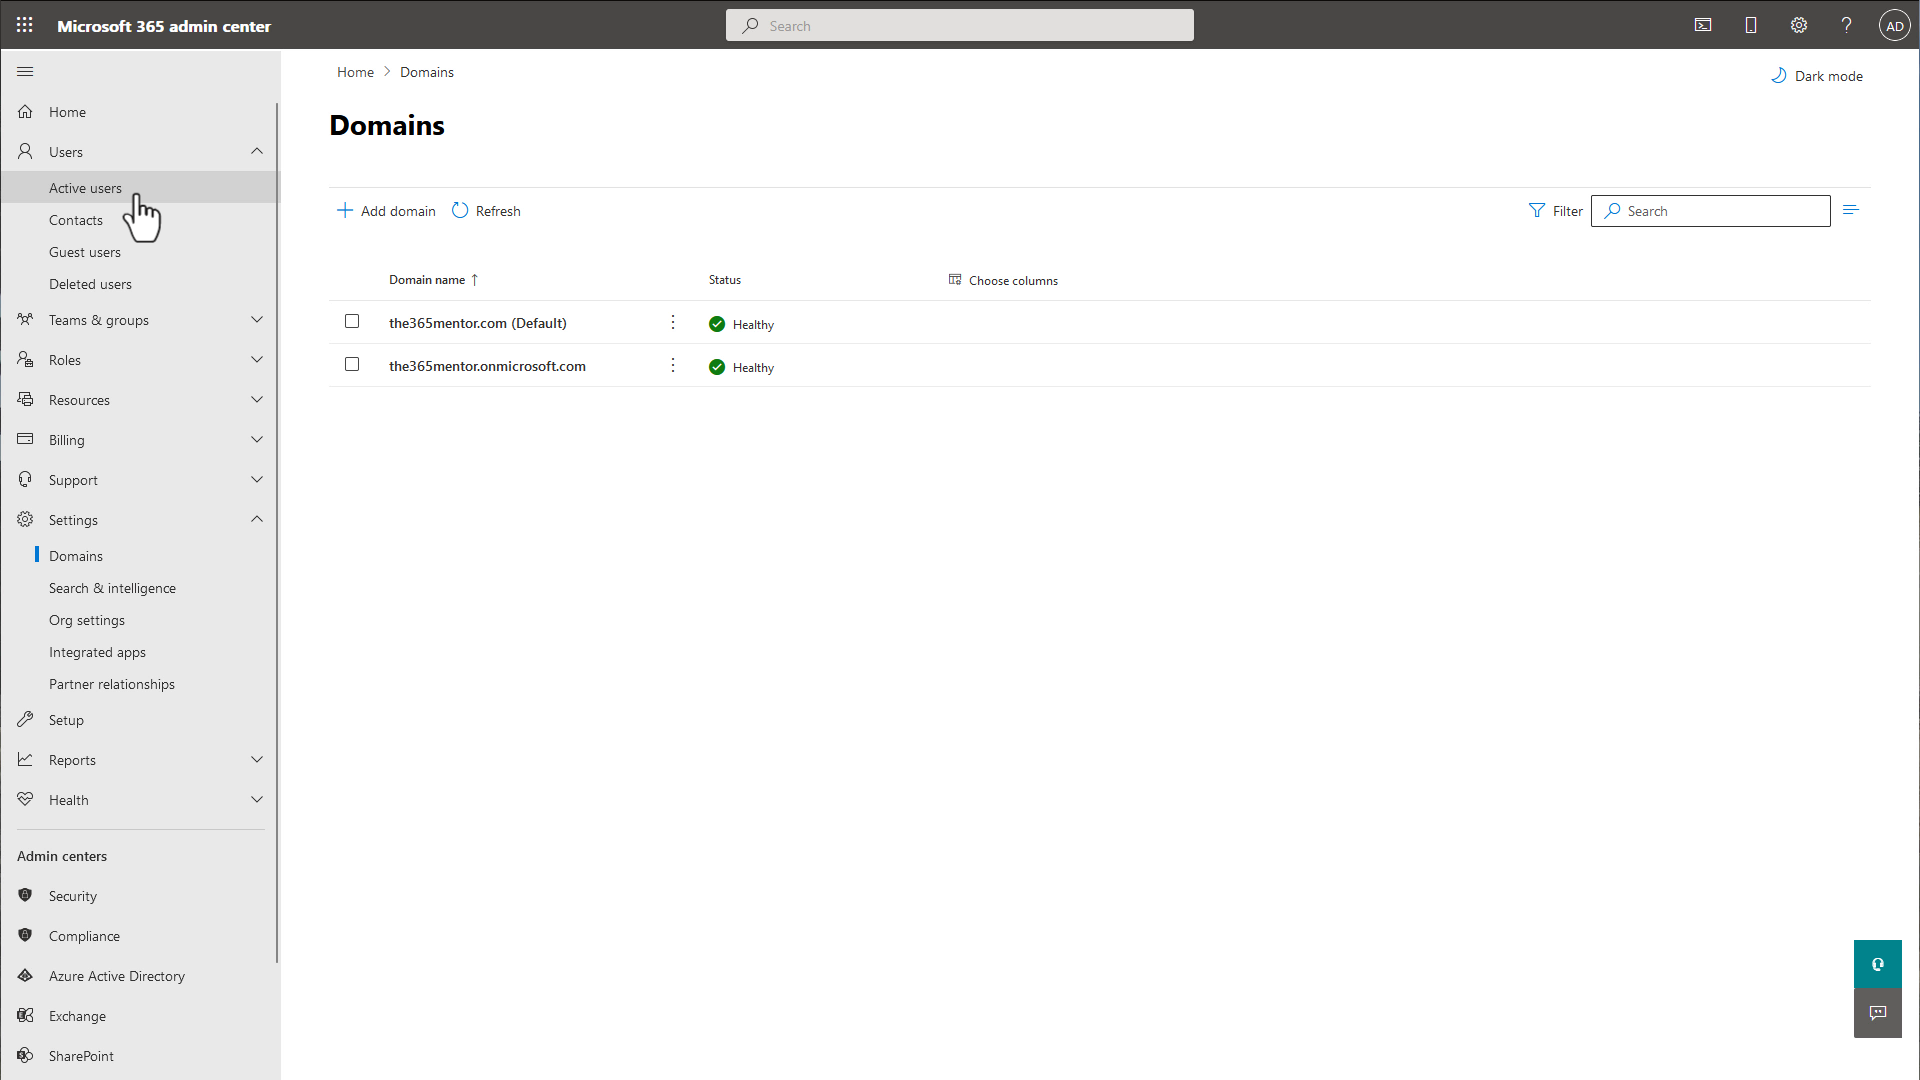
Then click the "Domains" menu item.
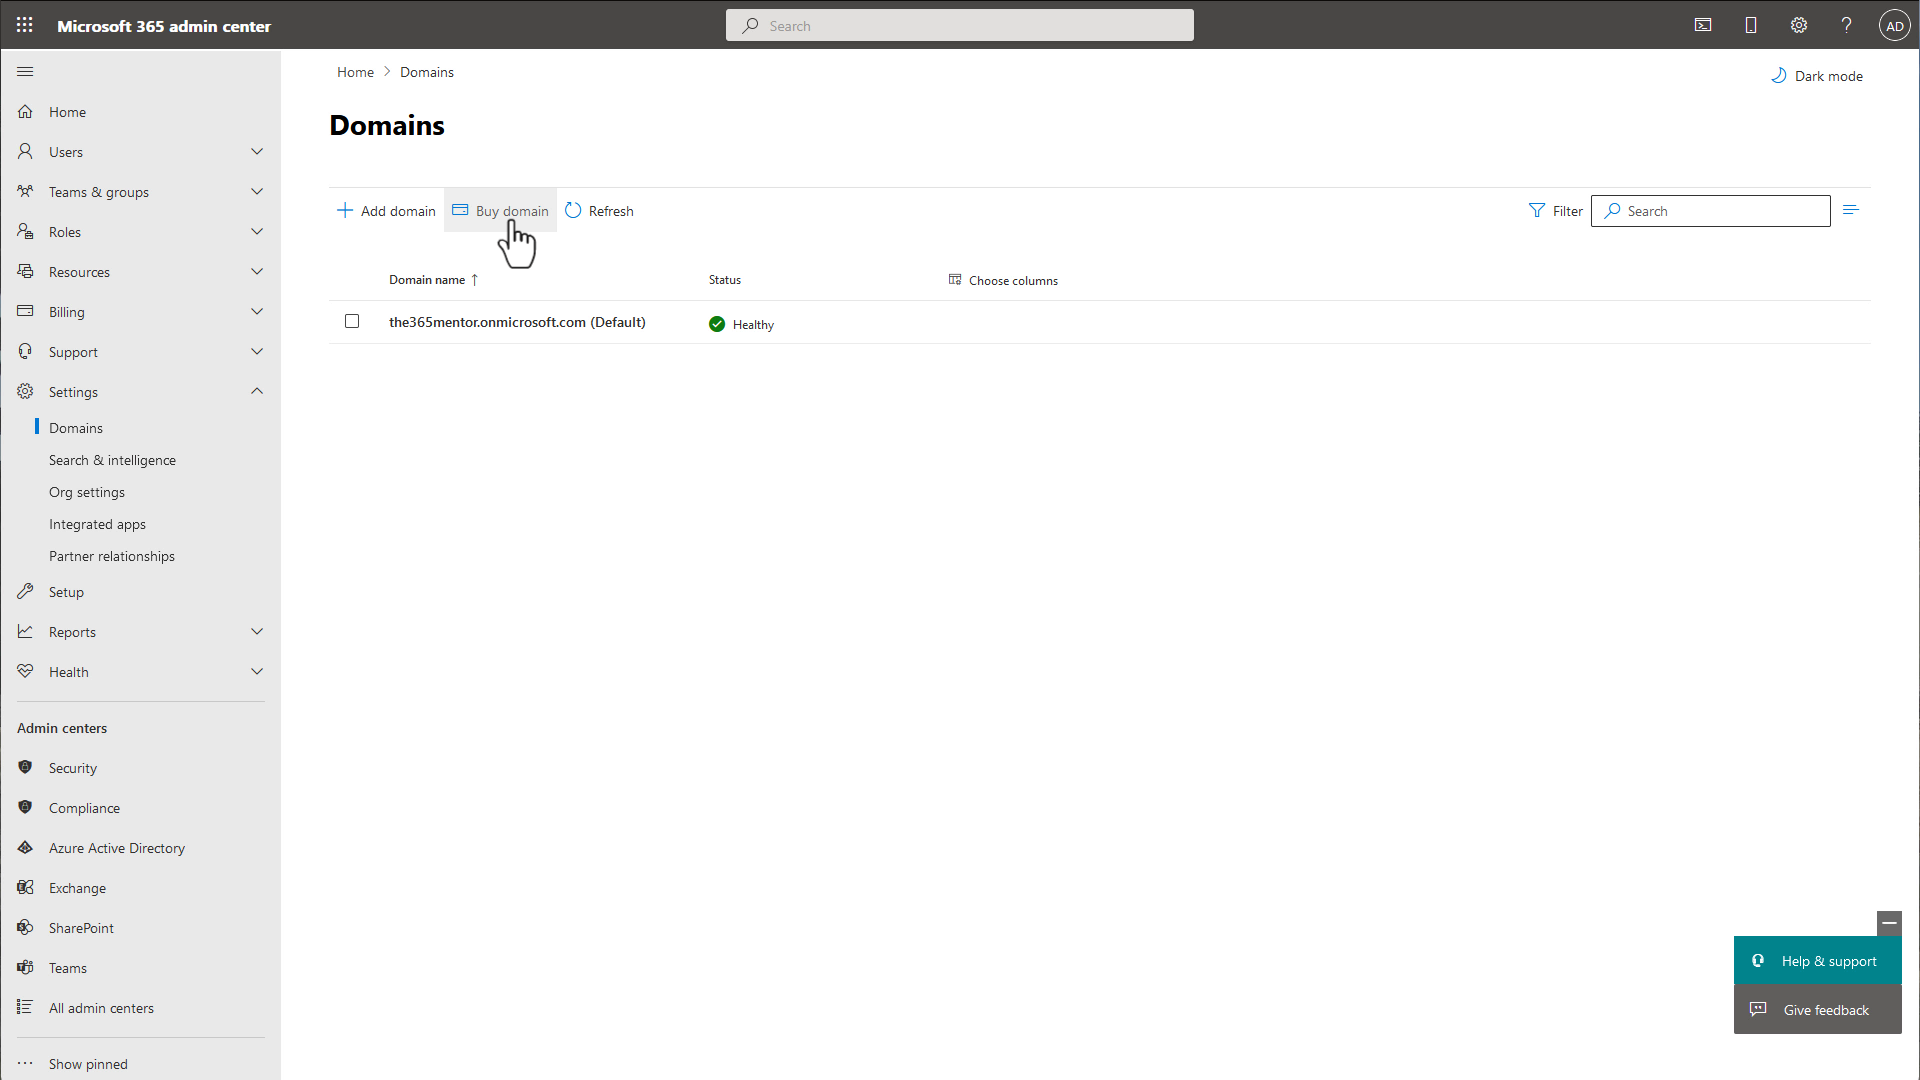
Now you will see your domain list. Currently there will only be the temporary domain (ends with onmicrosoft.com) in the list.
Click on the "Buy Domain" button in the top menu.
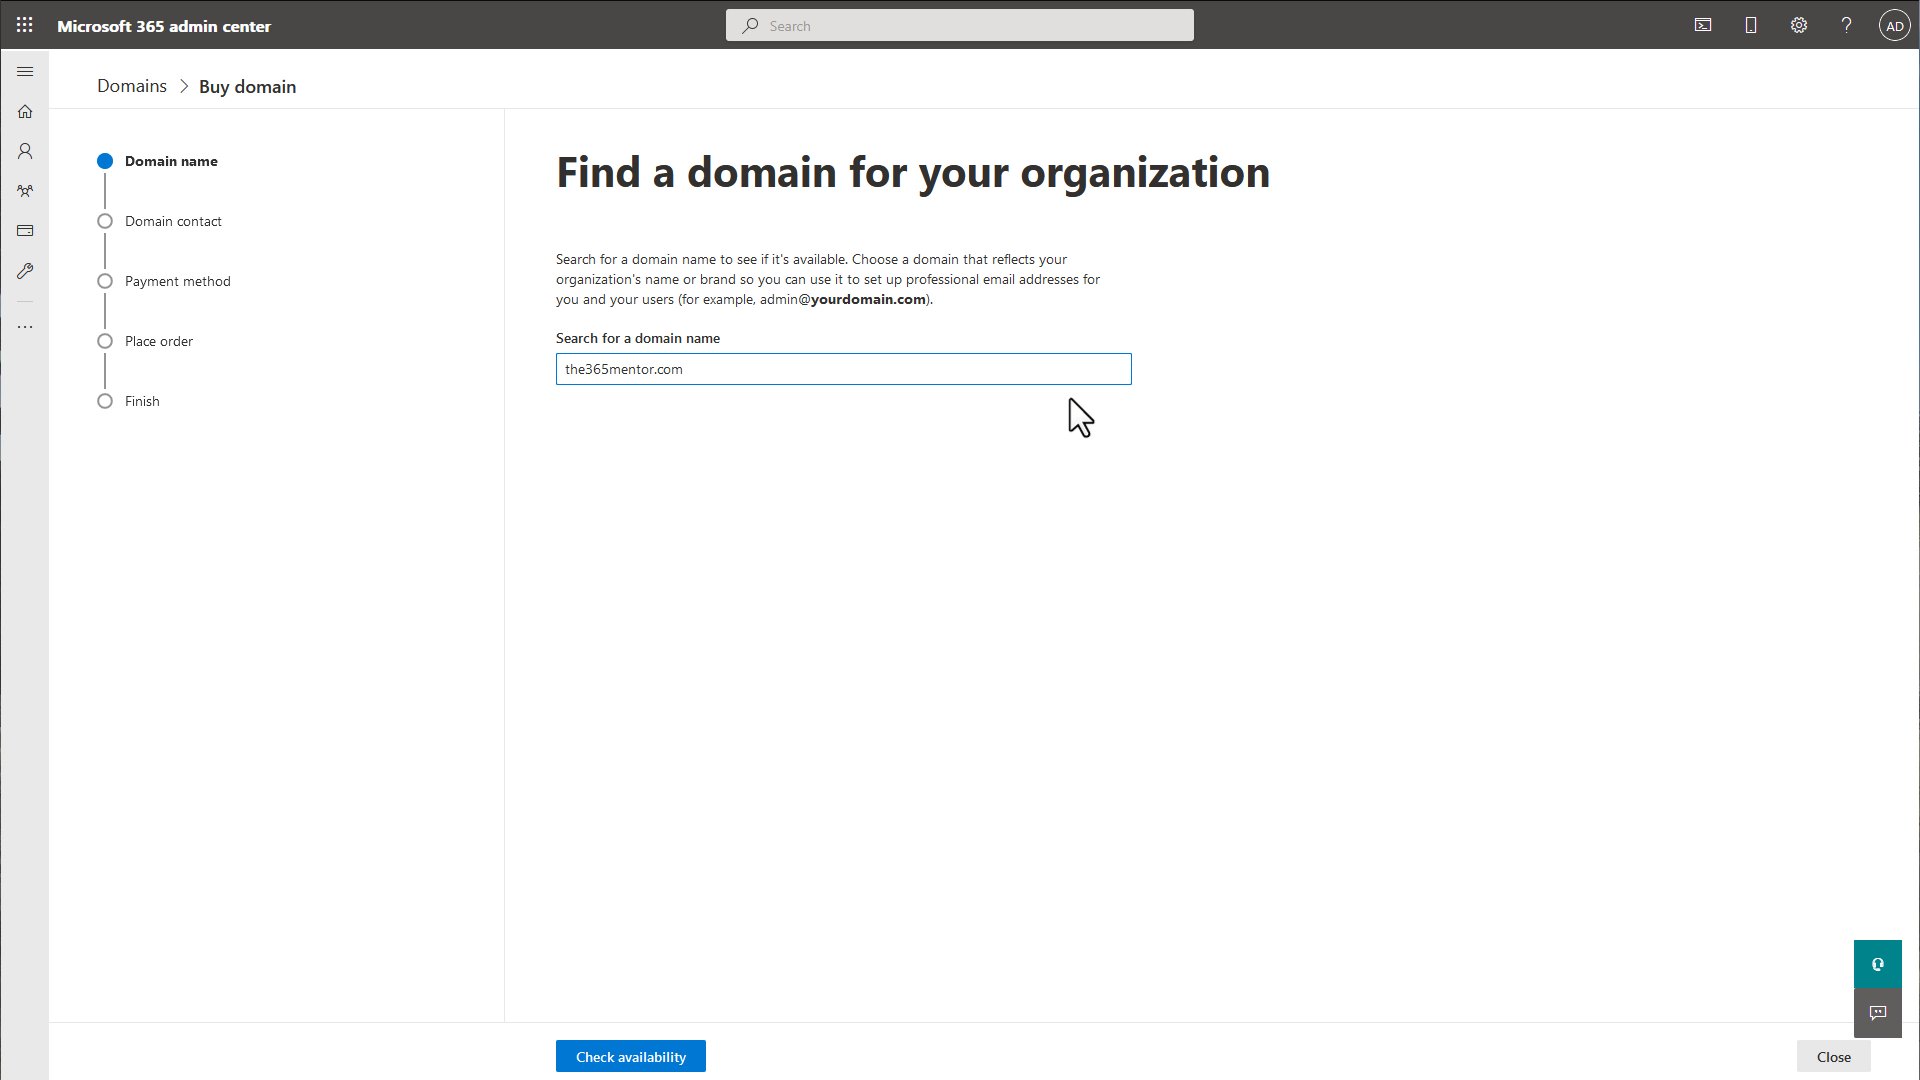
Now type your chosen domain into the field.
Then click the "Check availability" button at the bottom of the page.
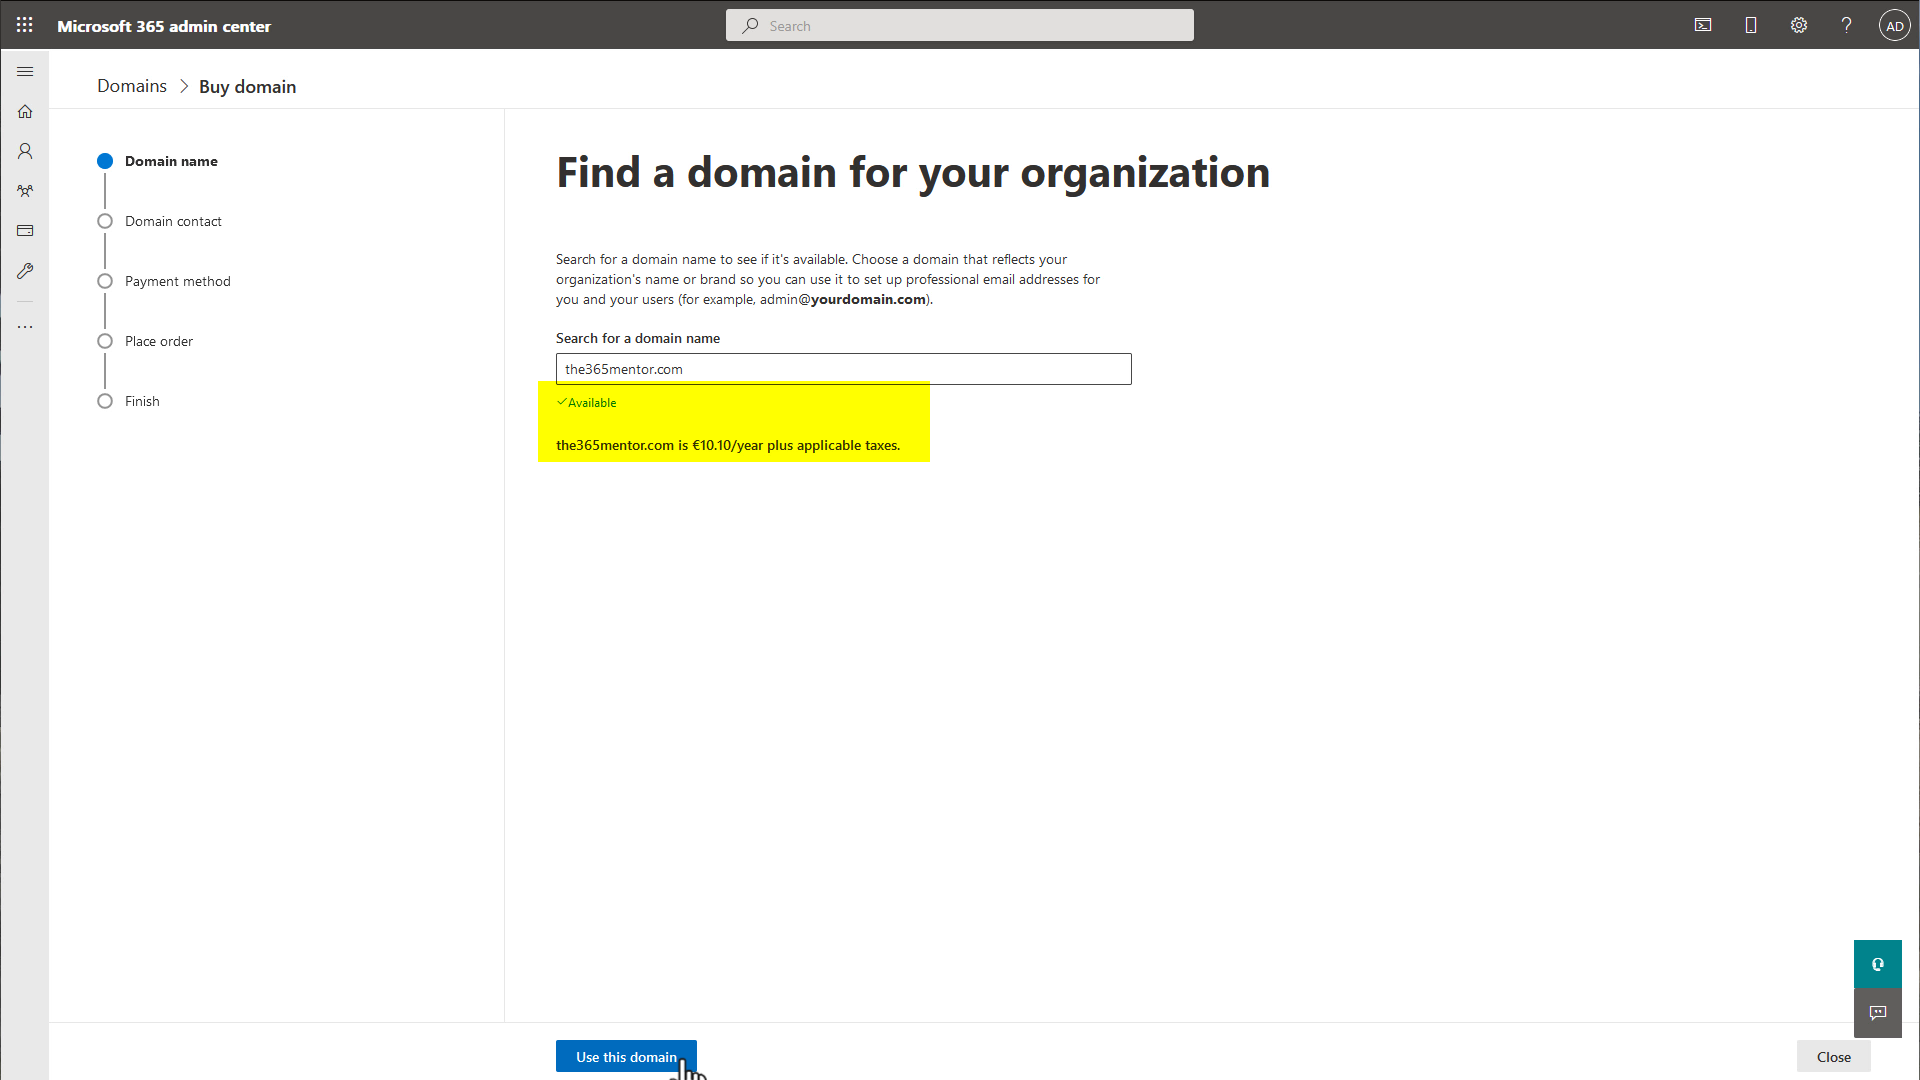
If you receive an error message then your domain has been registered since you chose it. In that case you can find another one using our simple tool to find an available business domain. Then just enter the new domain here.
If the domain is available, the price will be shown.
Click the "Use this domain" button at the bottom of the page.
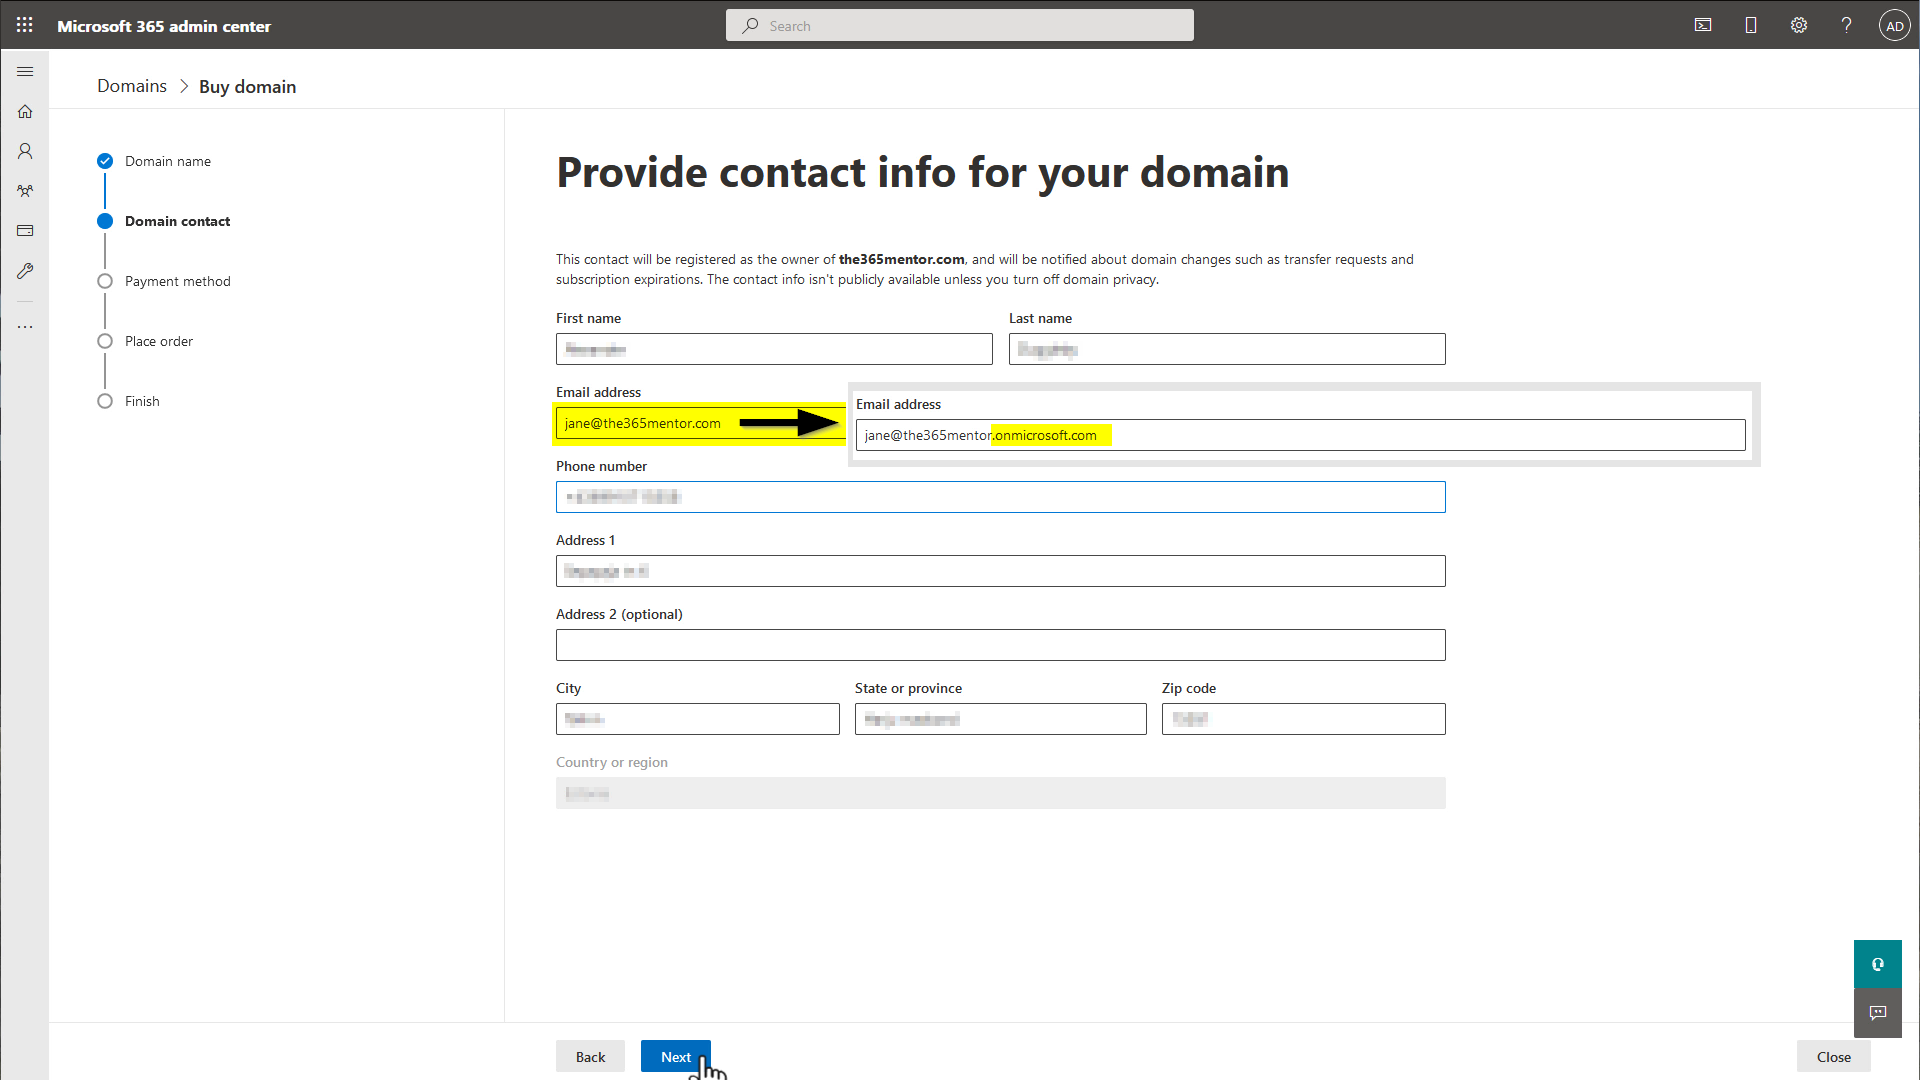
Next you need to confirm your contact information. Most of it will be prepopulated from the information you already provided, so just double-check everything.
Important: change the email address shown to the temporary username you wrote down in a previous step (here Jane changes jane@the365mentor.com to jane@the365mentor.onmicrosoft.com).
Then click the "Next" button.
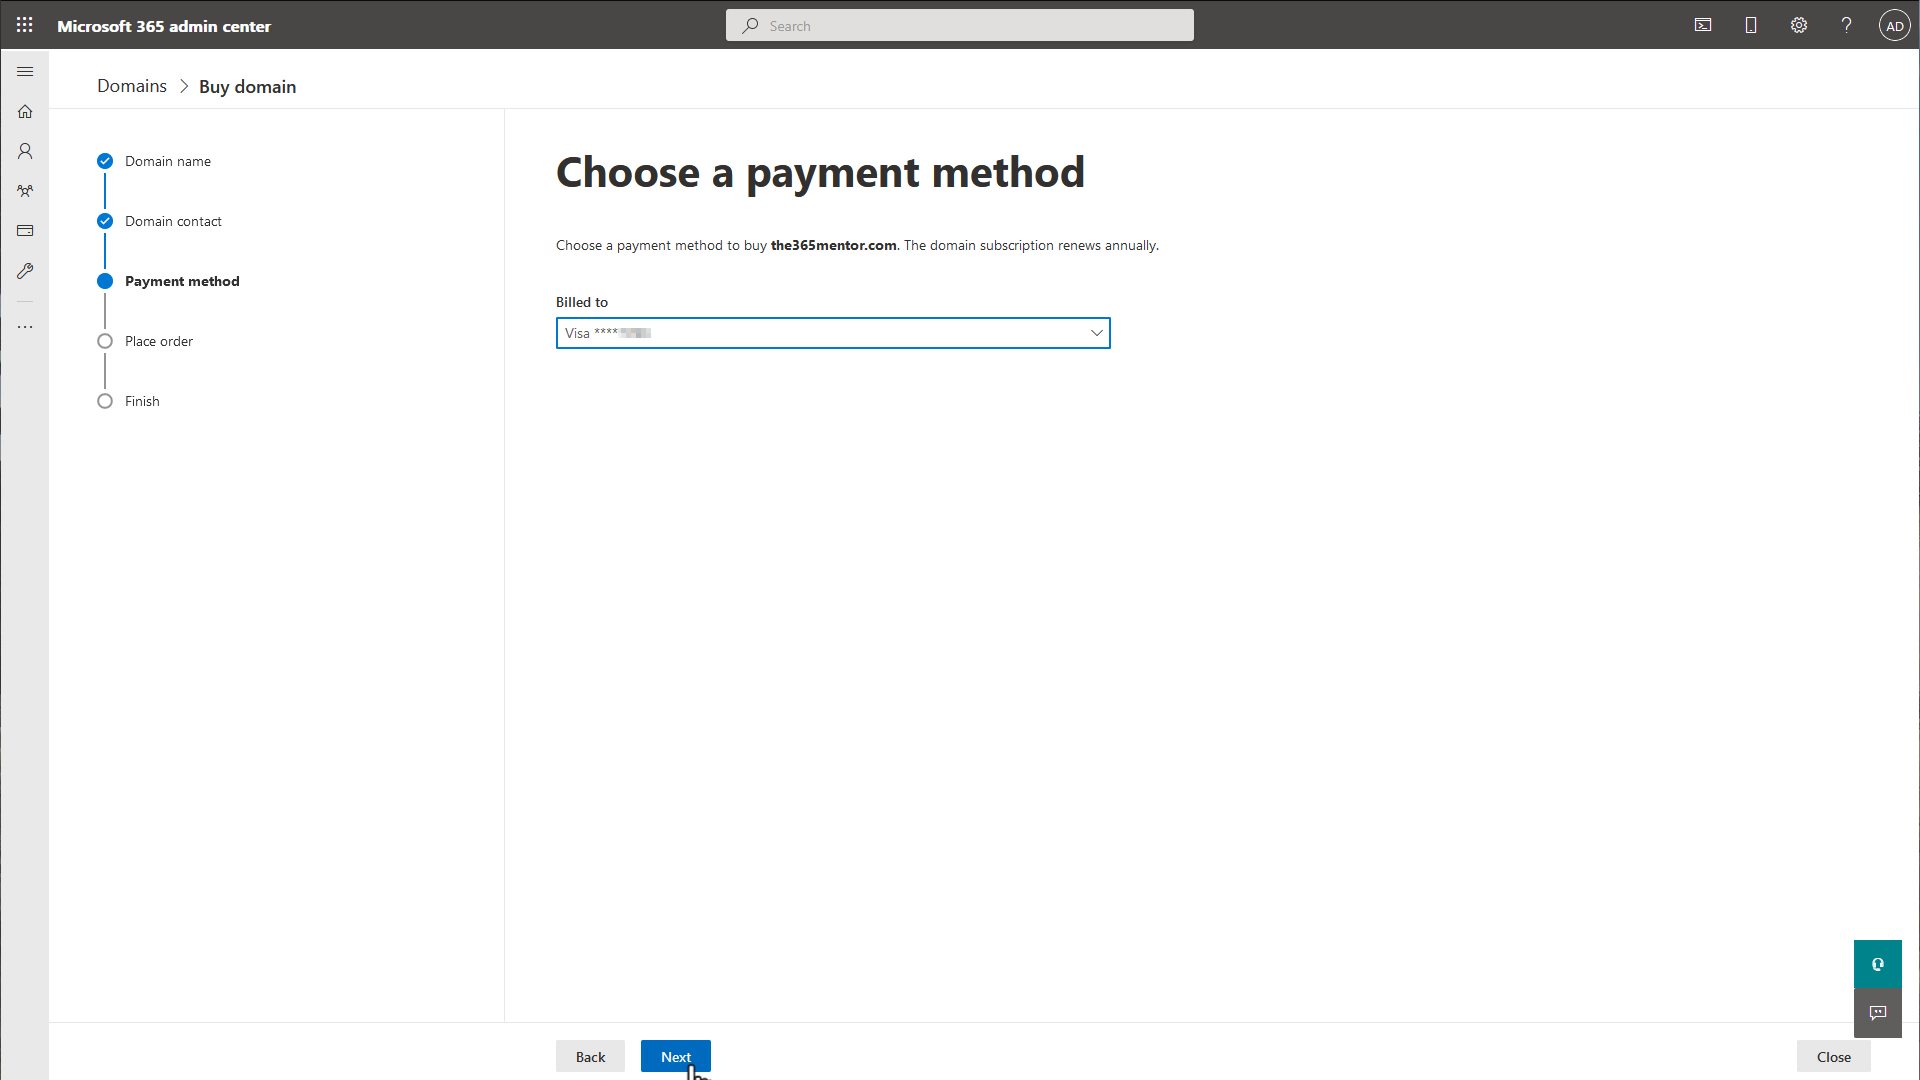
Next step is to choose your existing payment information.
Click the select box and choose the existing credit card you added previously.
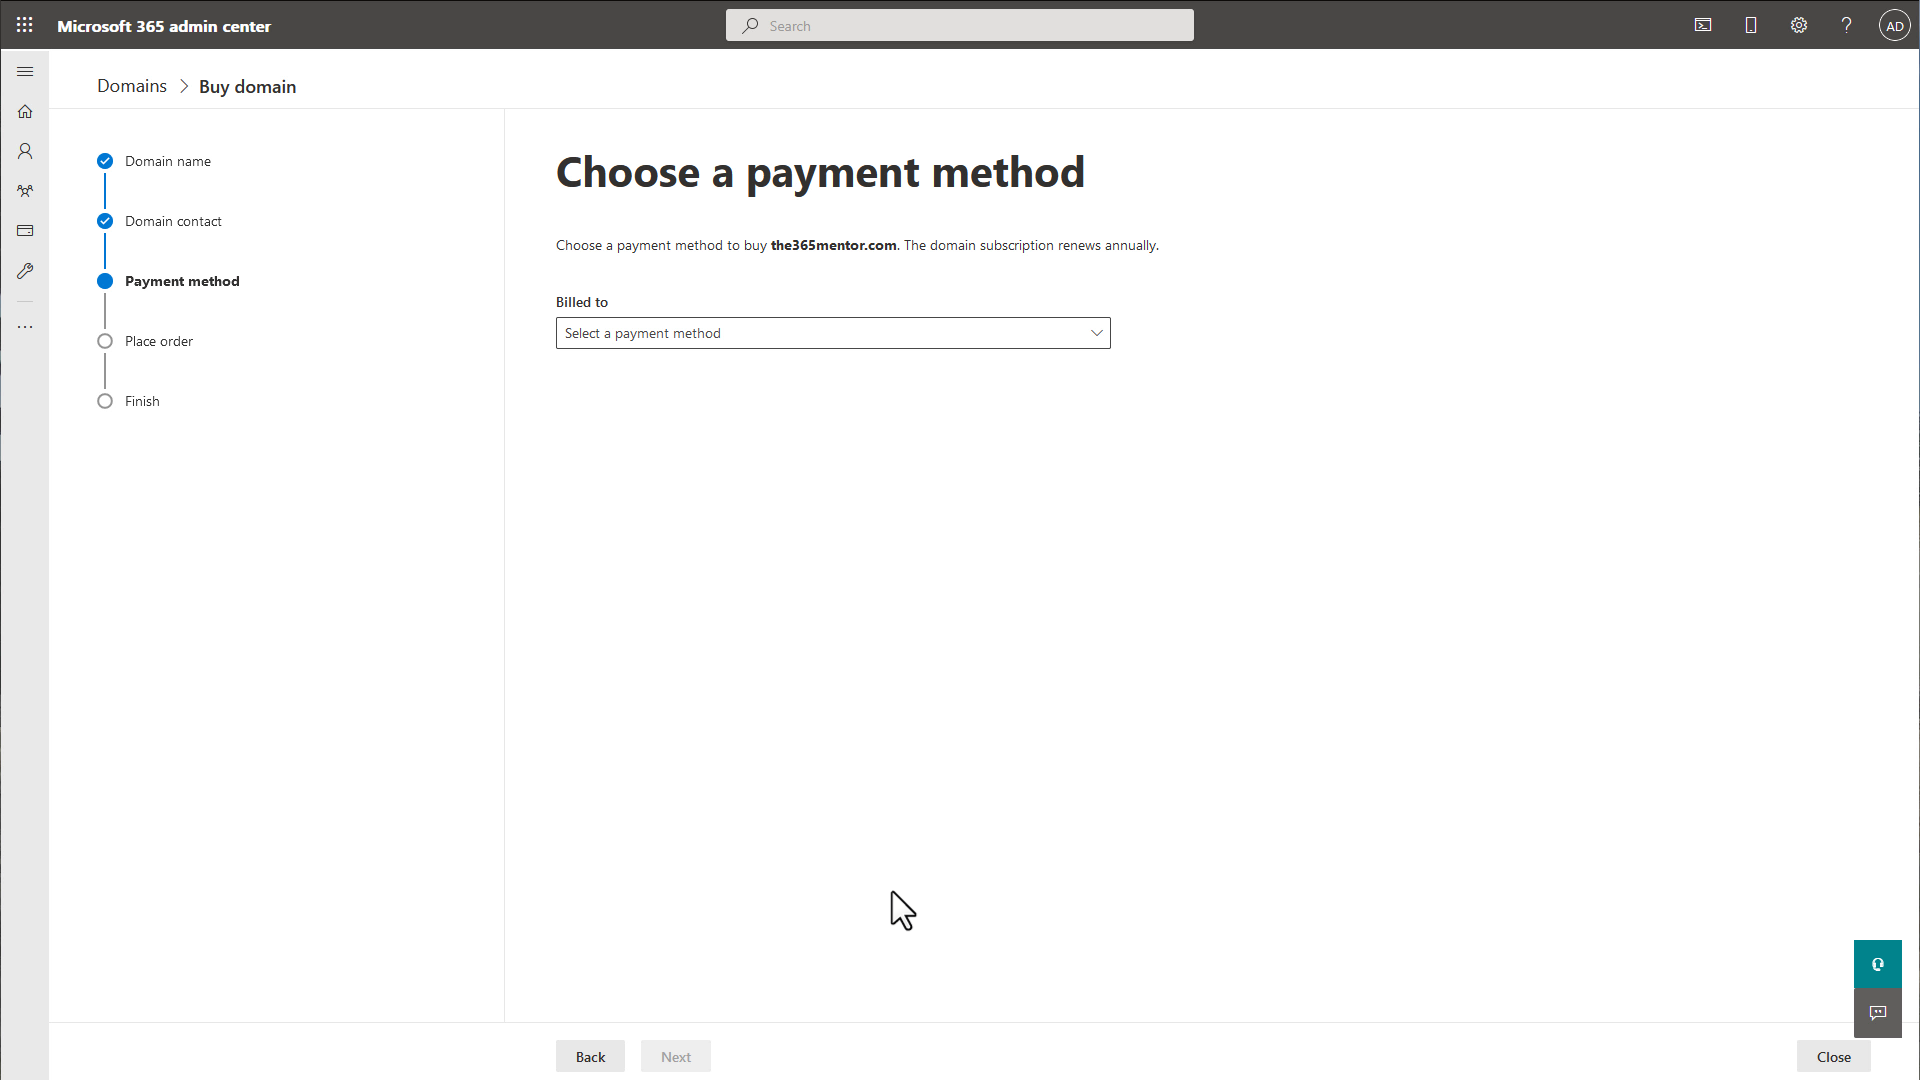
Then click the "Next" button.
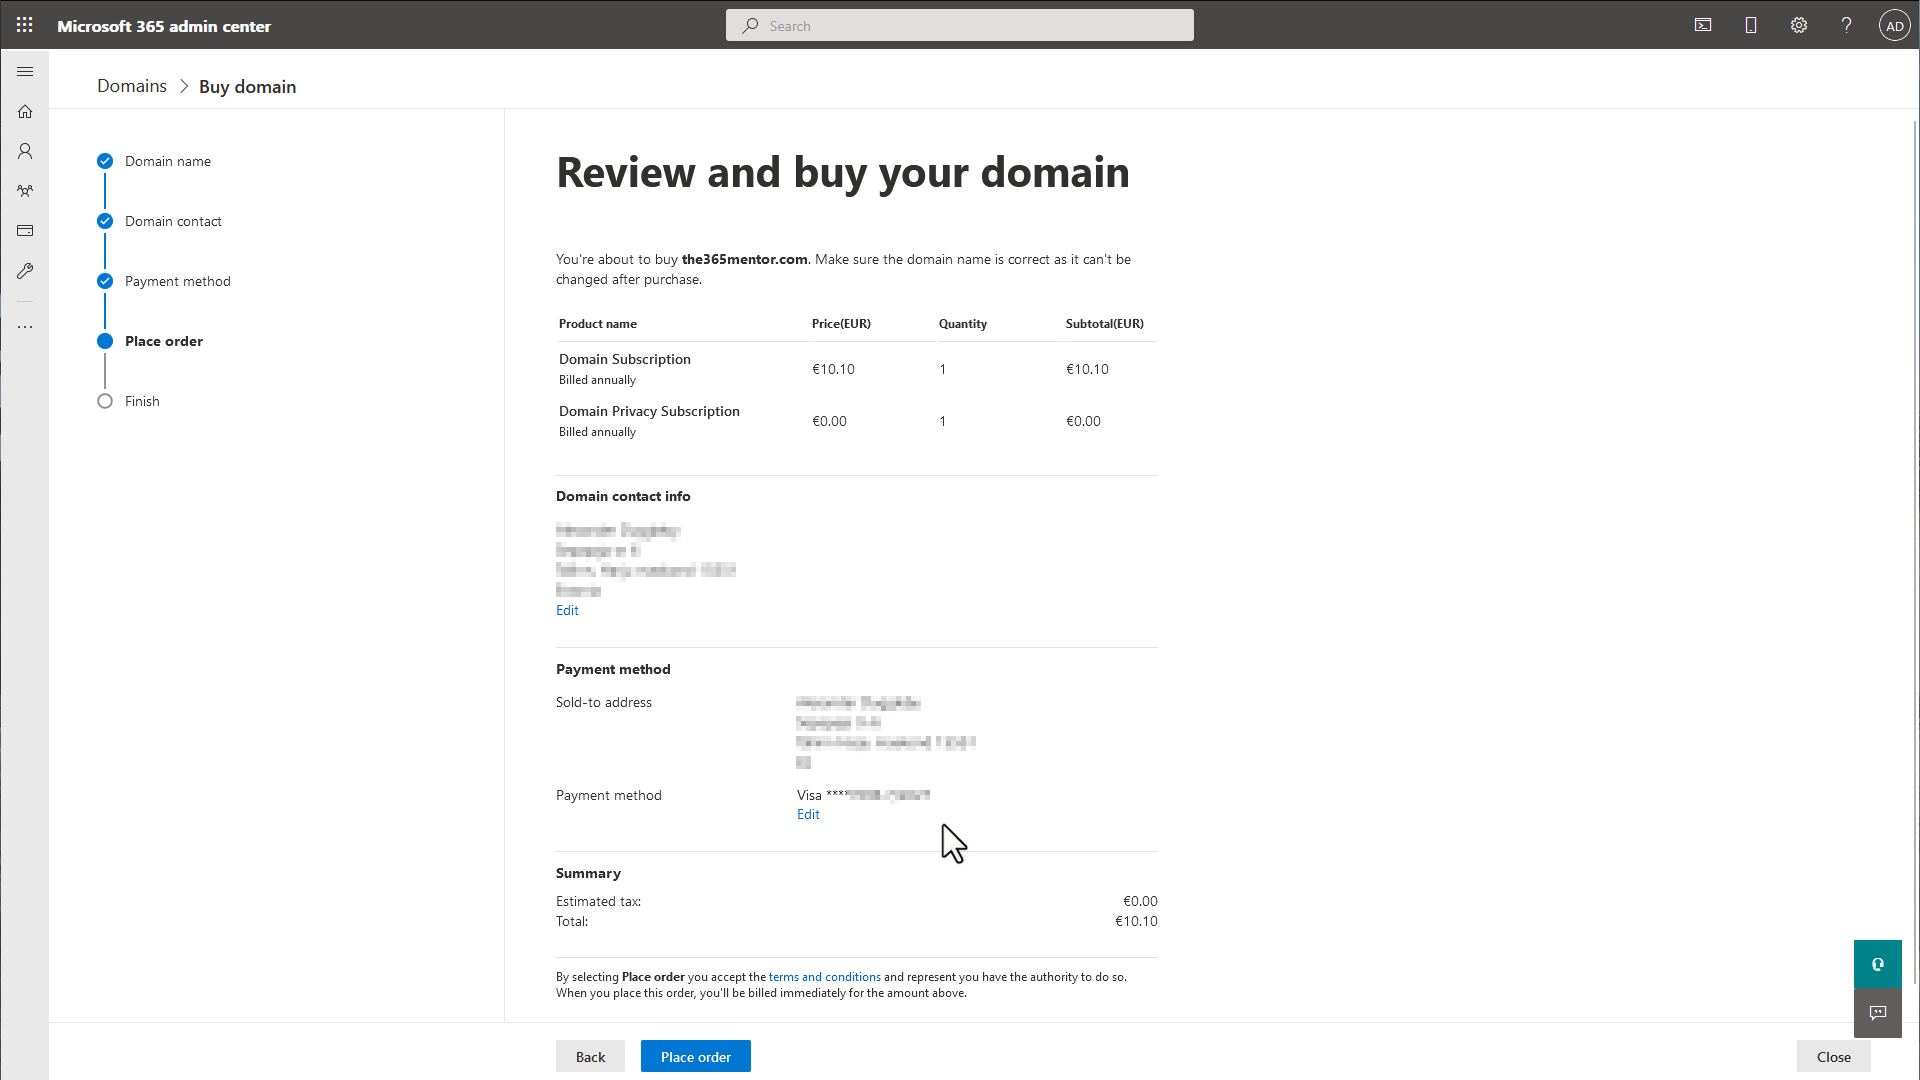
You will be presented with a order summary page. Again you can double-check your billing information.
If you are VAT-exempt you can add your tax id at this stage just below your "Sold-to address".
Then click the "Place order" button.
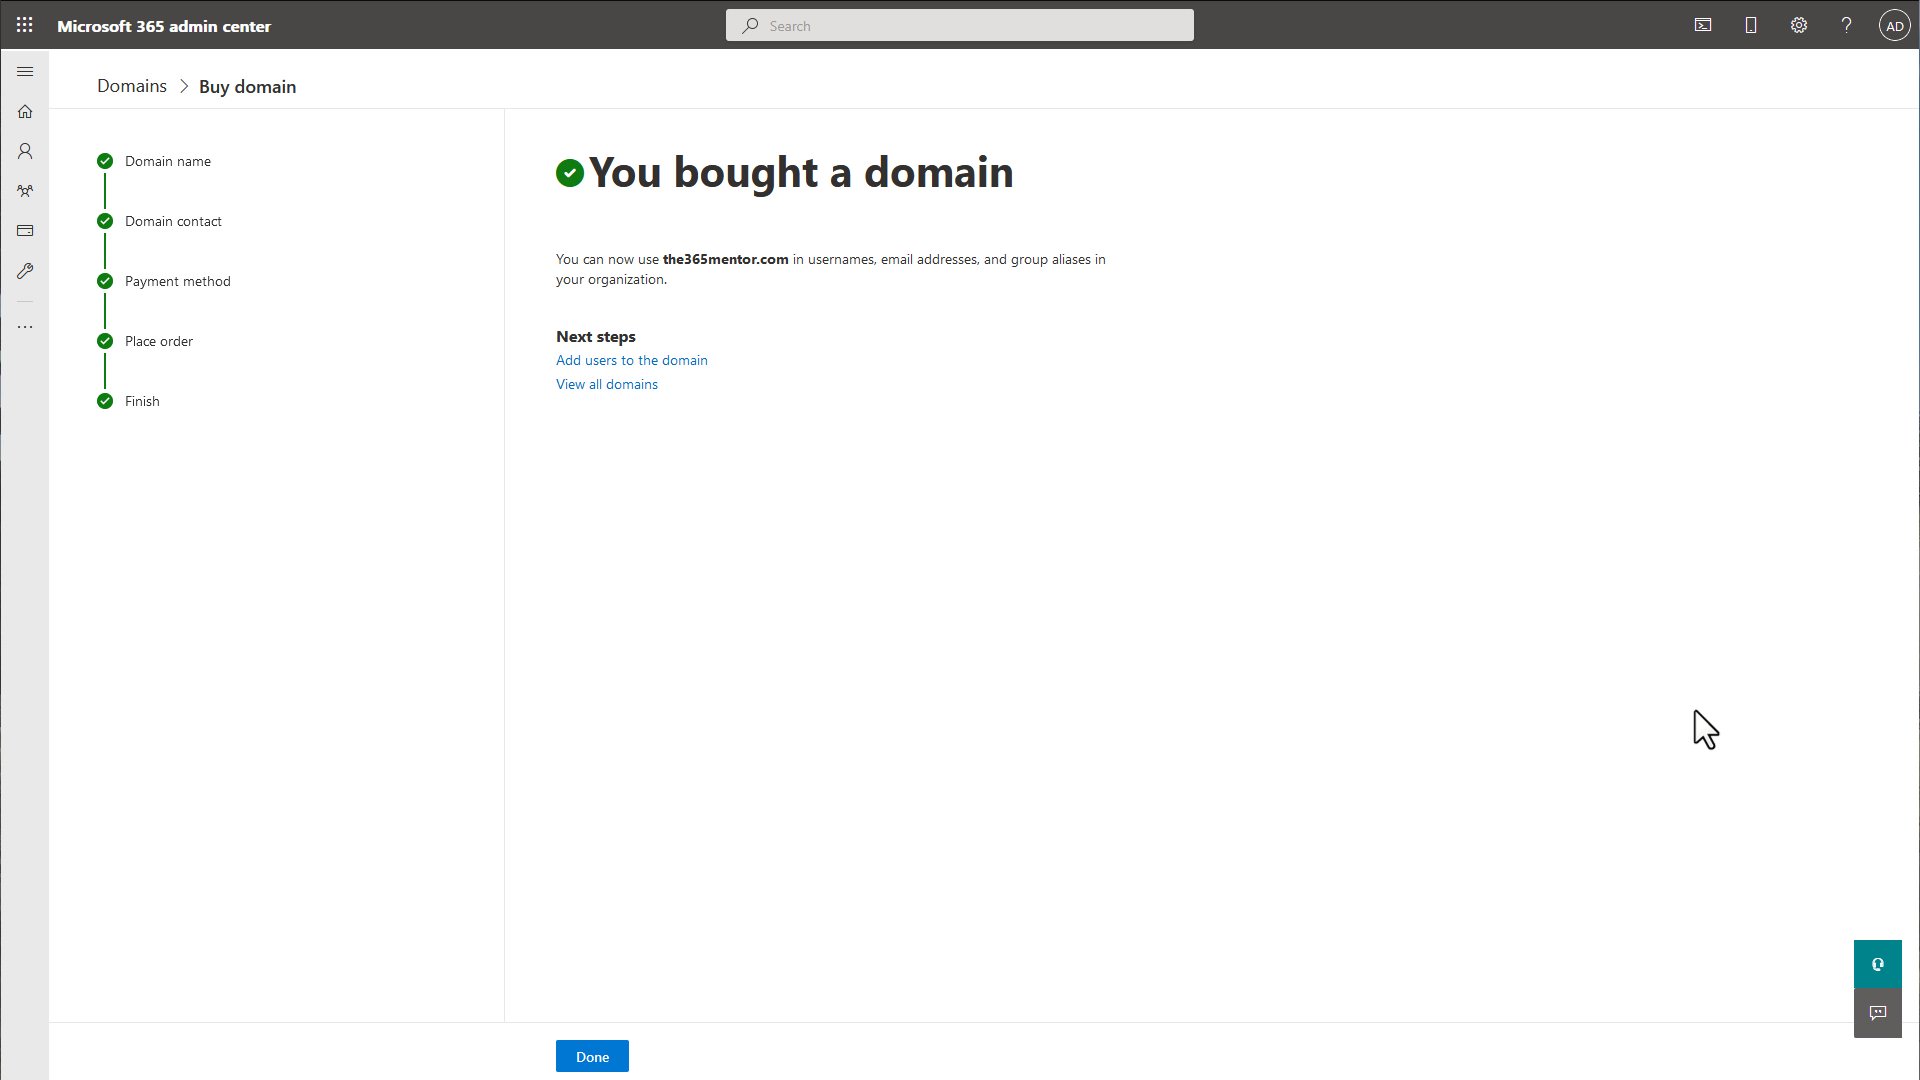
Congratulations, you've just bought your first domain!
Now click the "Done" button.
3. Setup an email address with Microsoft 365
You'll be taken back to the domains page. Your domain might now show immediately, but don't worry it's being setup behind the scenes. We will continue setting up your email.
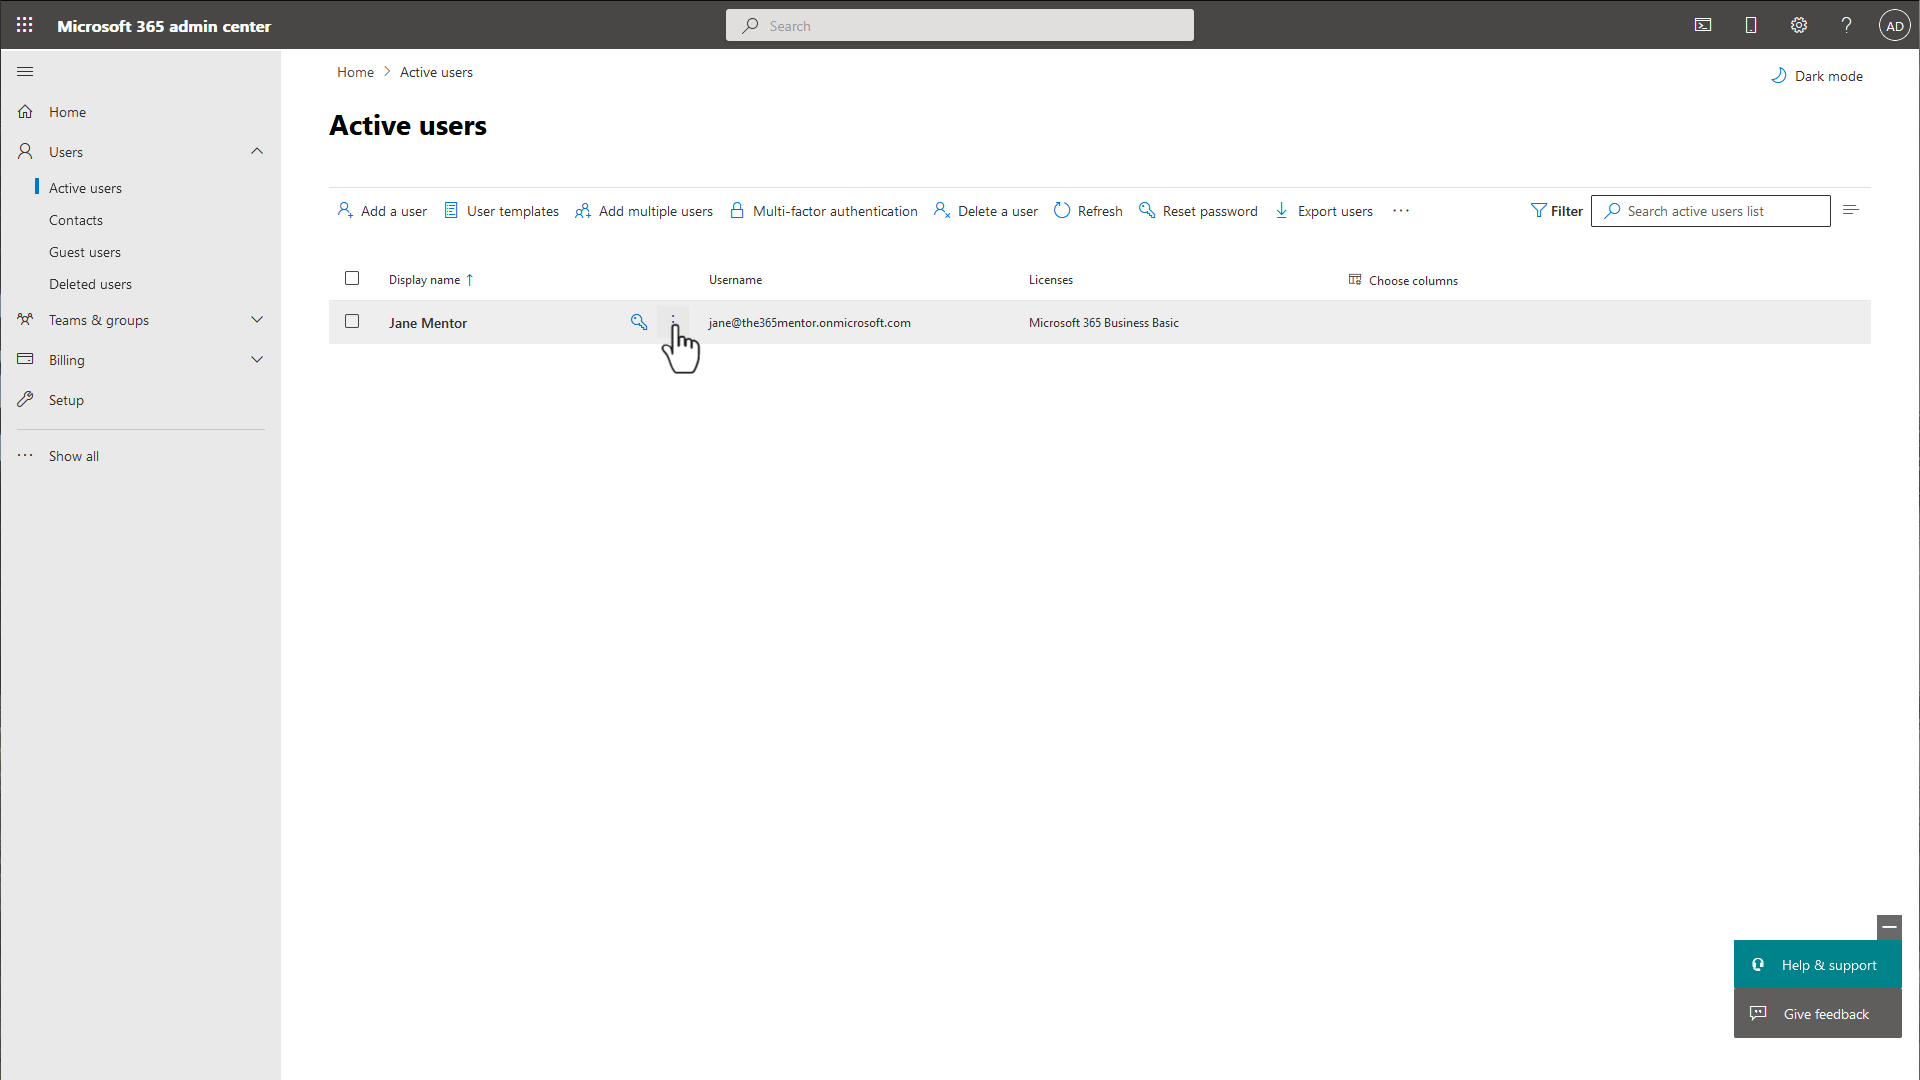
From the left sidebar, first expand the "Users" menu and then click the "Active Users" menu item.
Now a list of active users will be shown. There should only be one entry.
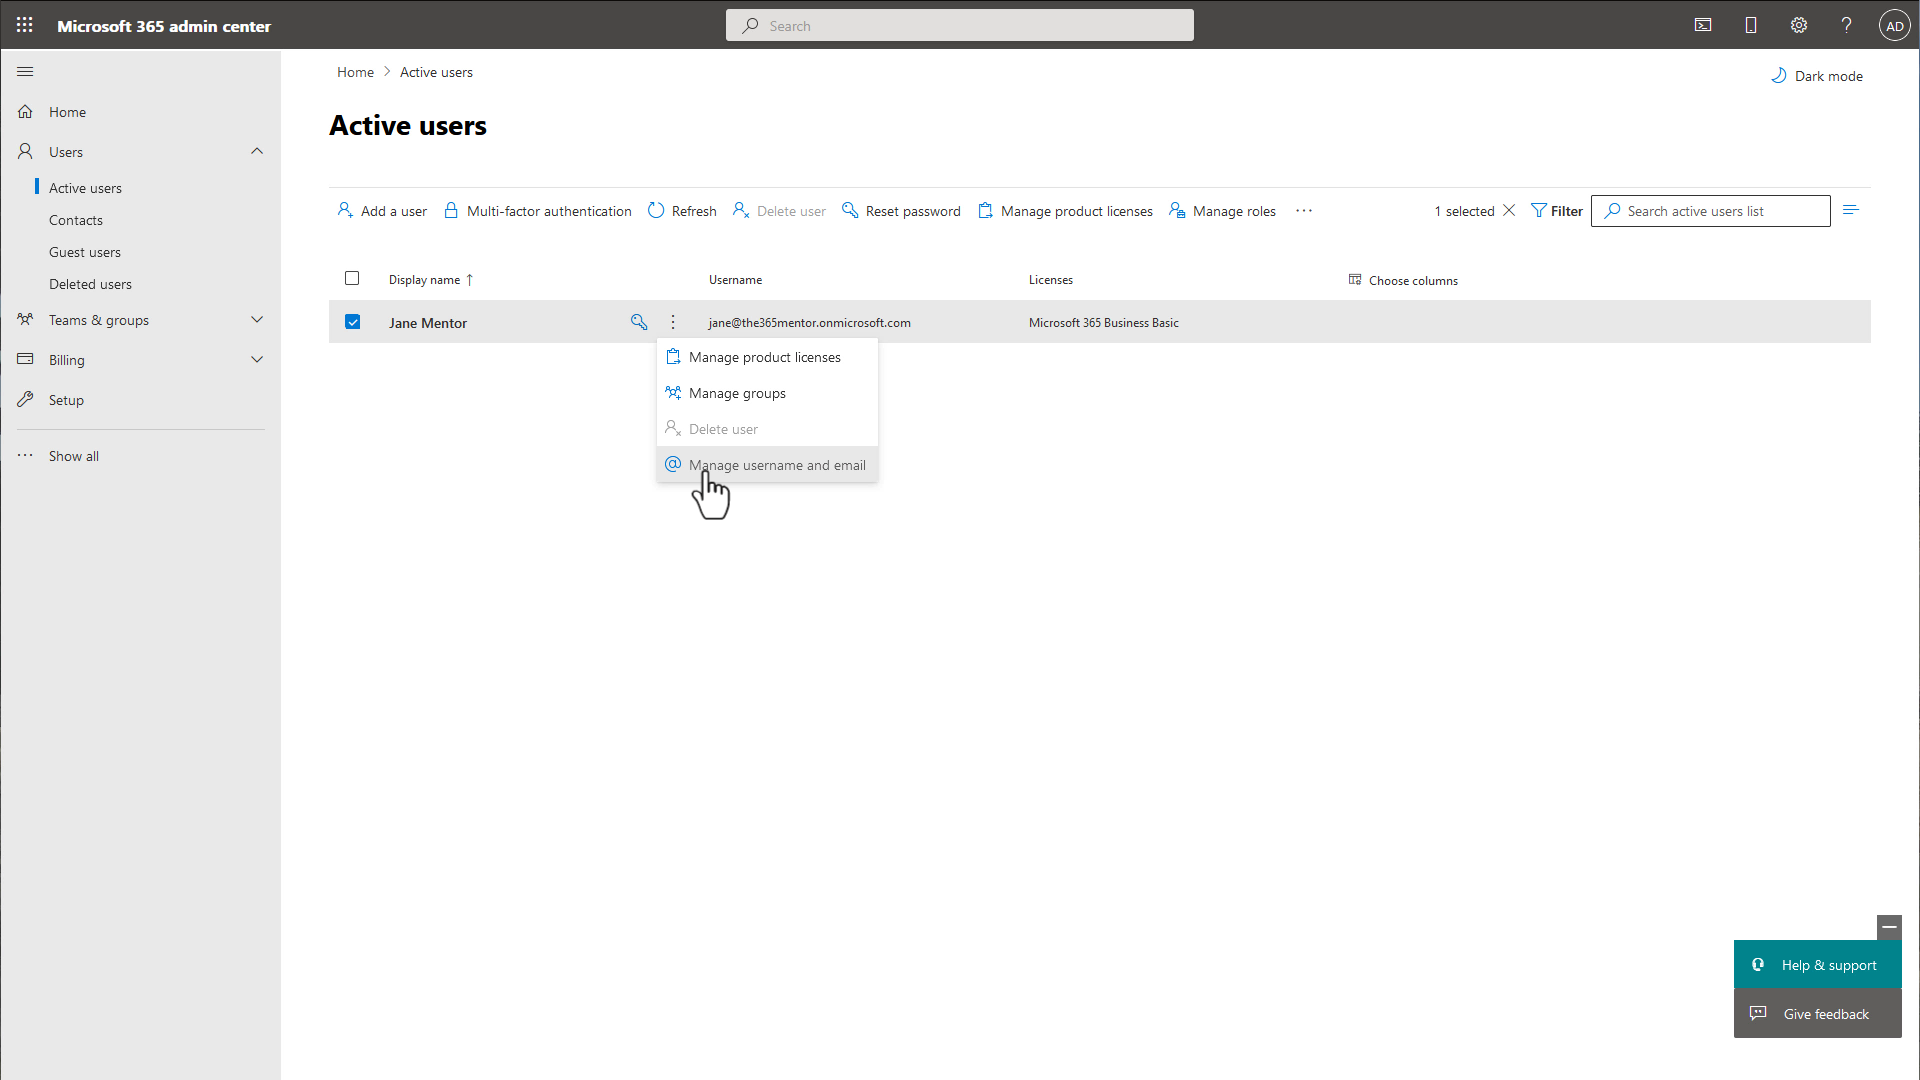
Next to your name click the three little dots to open a menu.
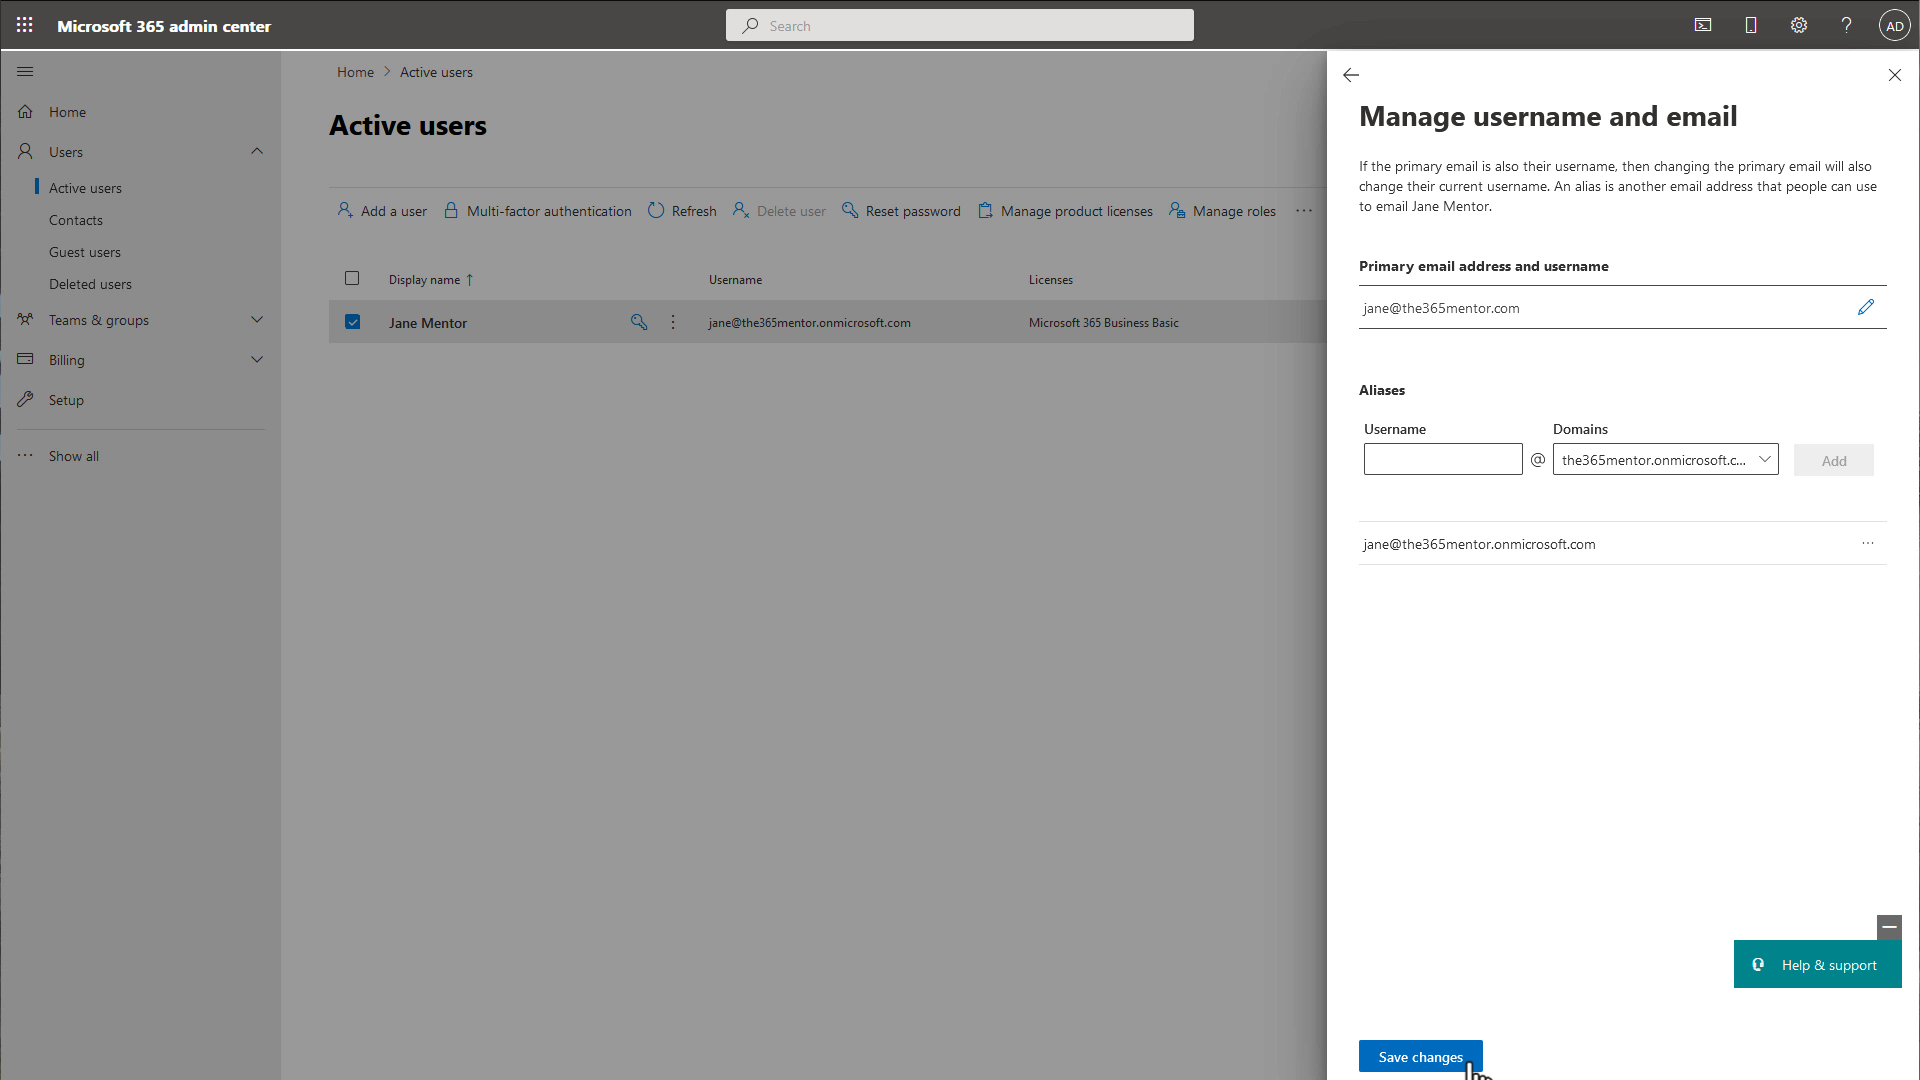
In the menu that opens, click "Manage username and email".
A sidebar will open. Find the dropdown on the right that is showing your temporary domain (ends with onmicrosoft.com).
Click the select box to open it and choose the domain you just bought.
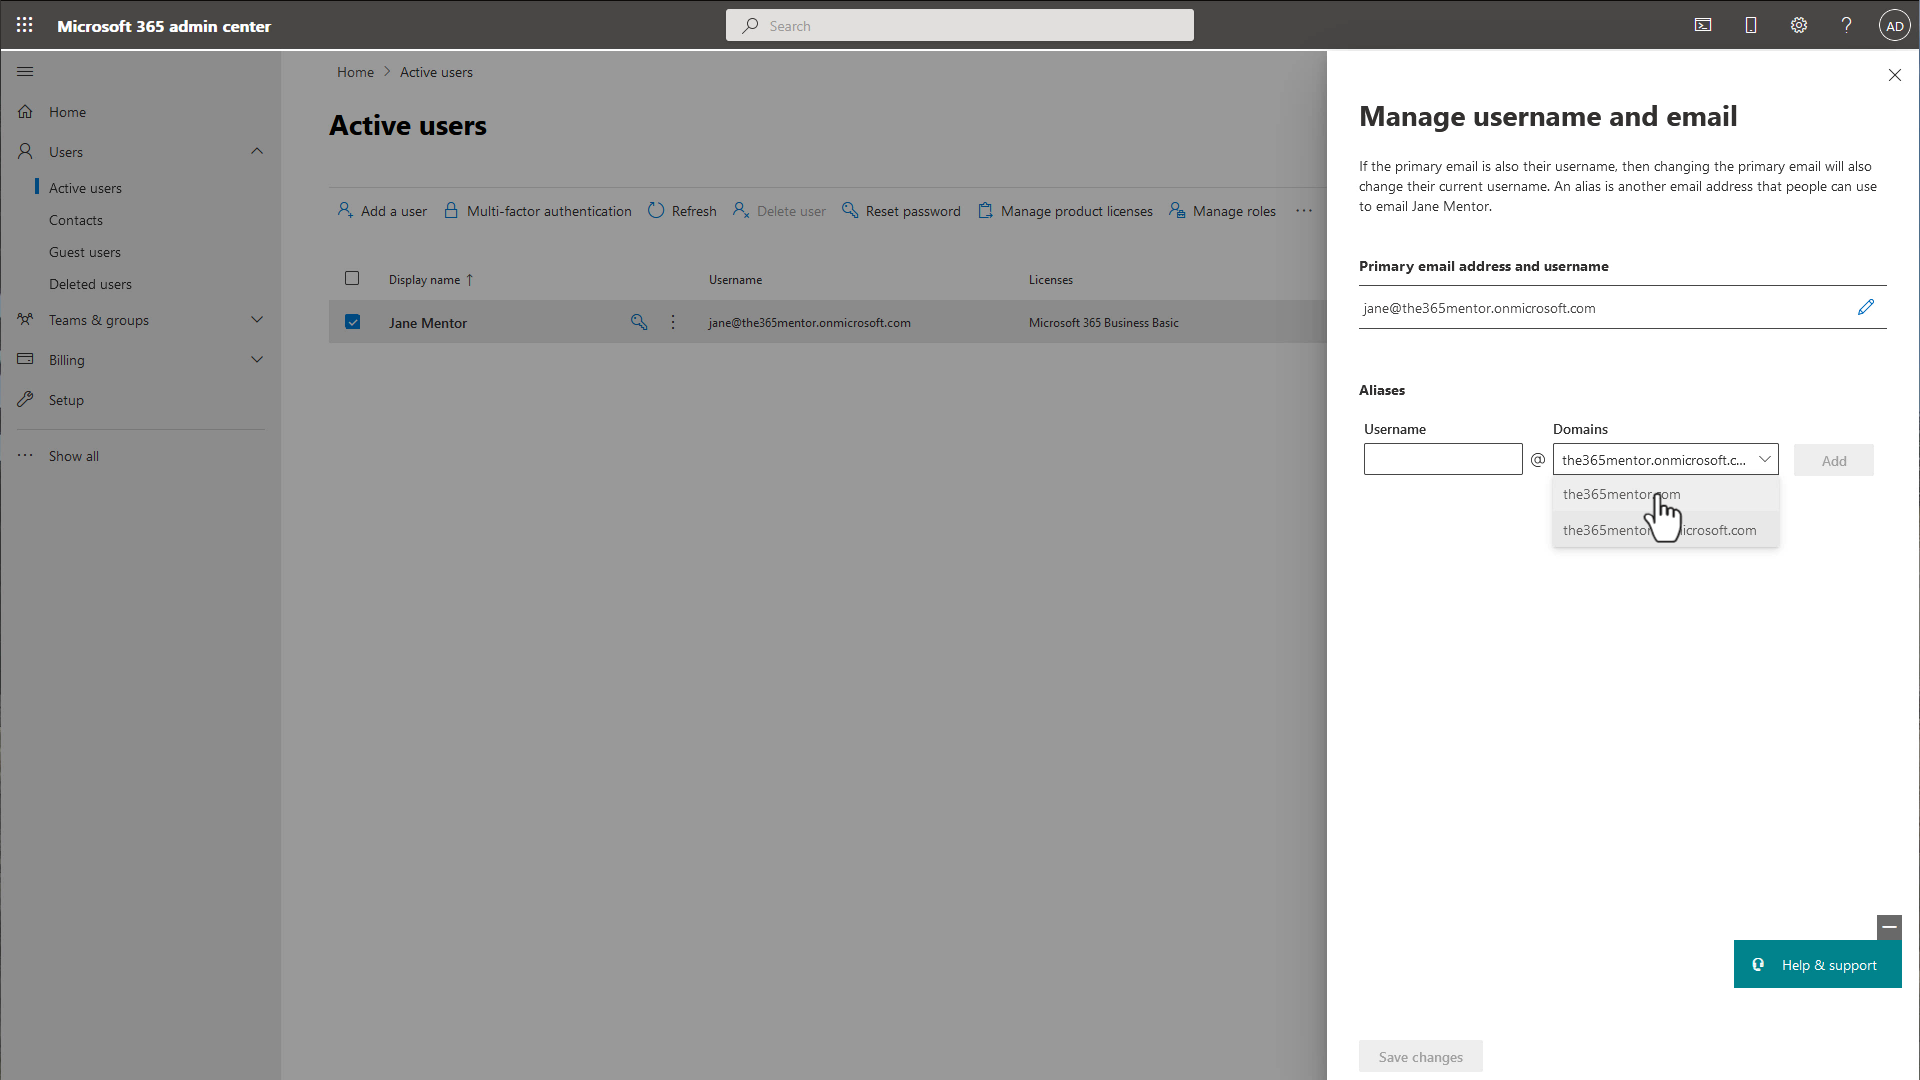
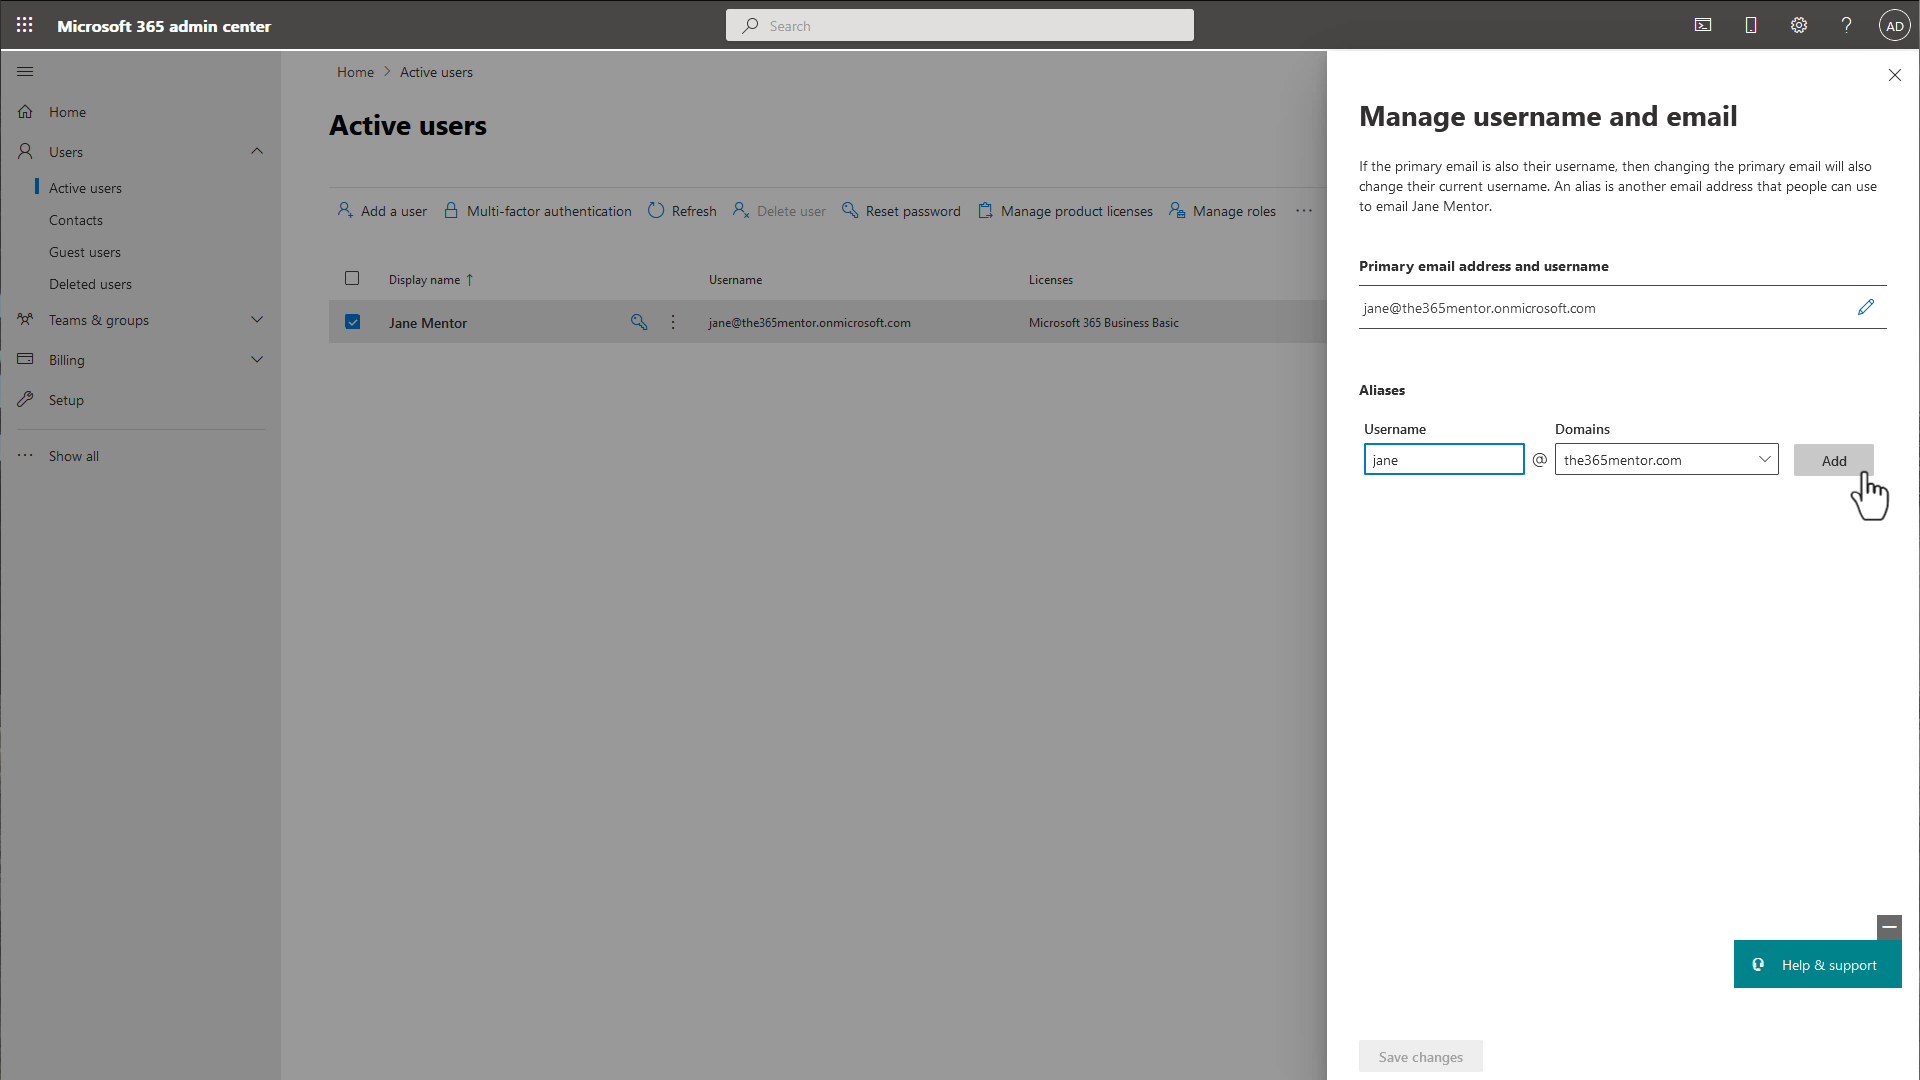
Next you type in your first name again in the first field.
Then click the "Add" button.
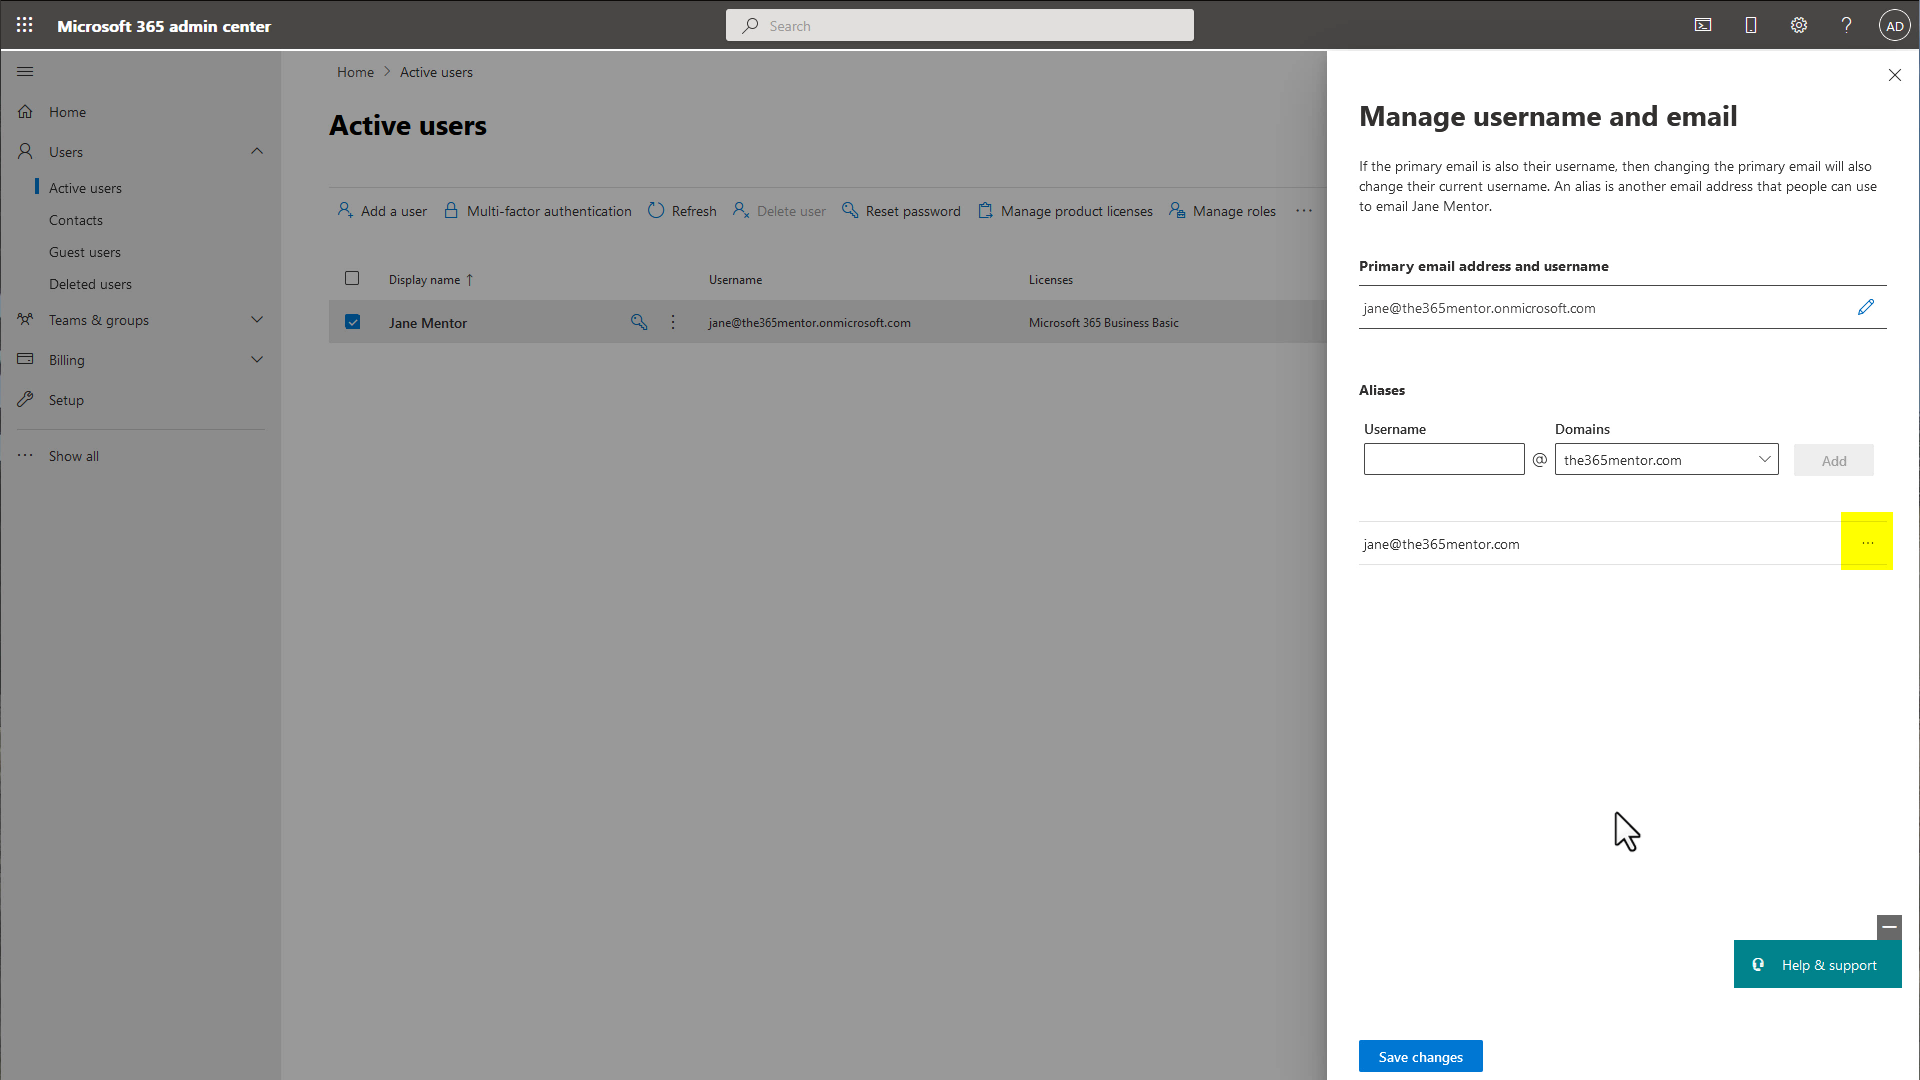
The new email address will appear. Double-check that it is correct.
Next to it click on the three dots icon to open a menu.
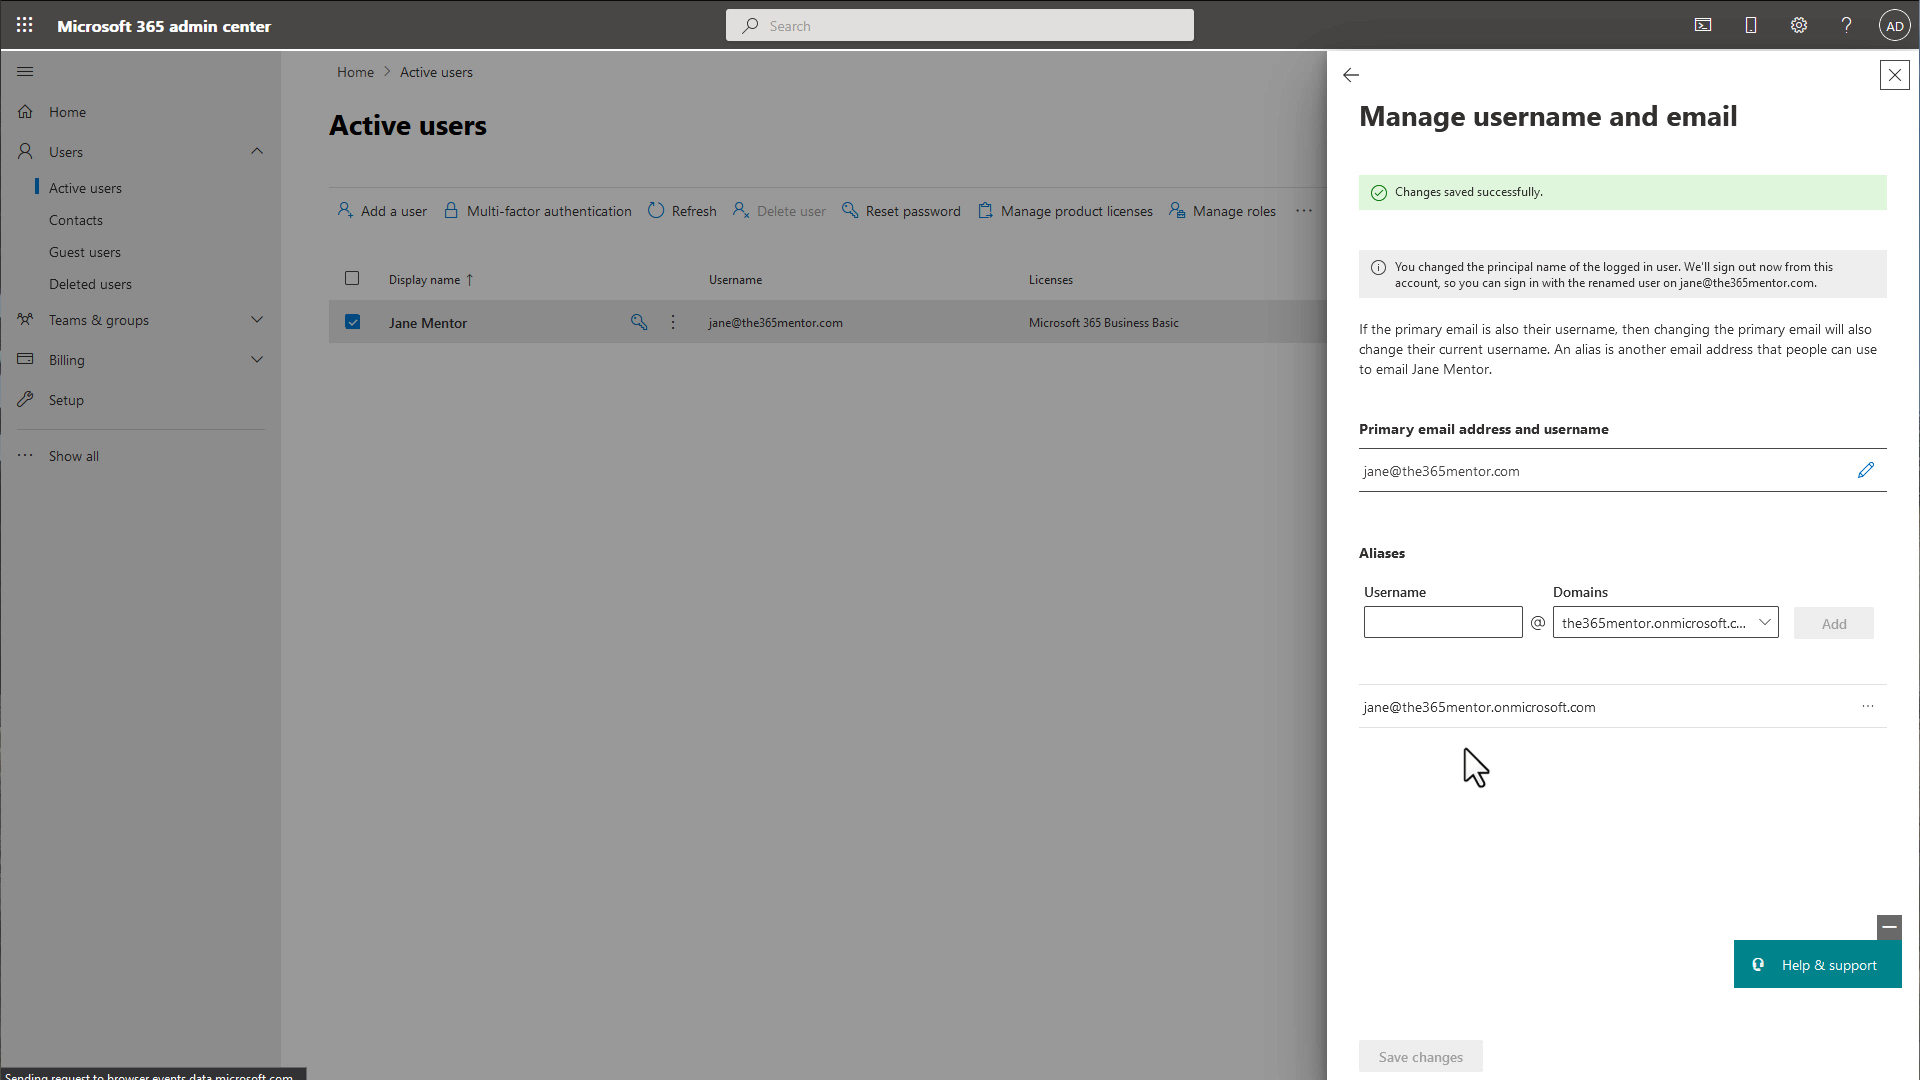
In this menu select "Change to primary email".
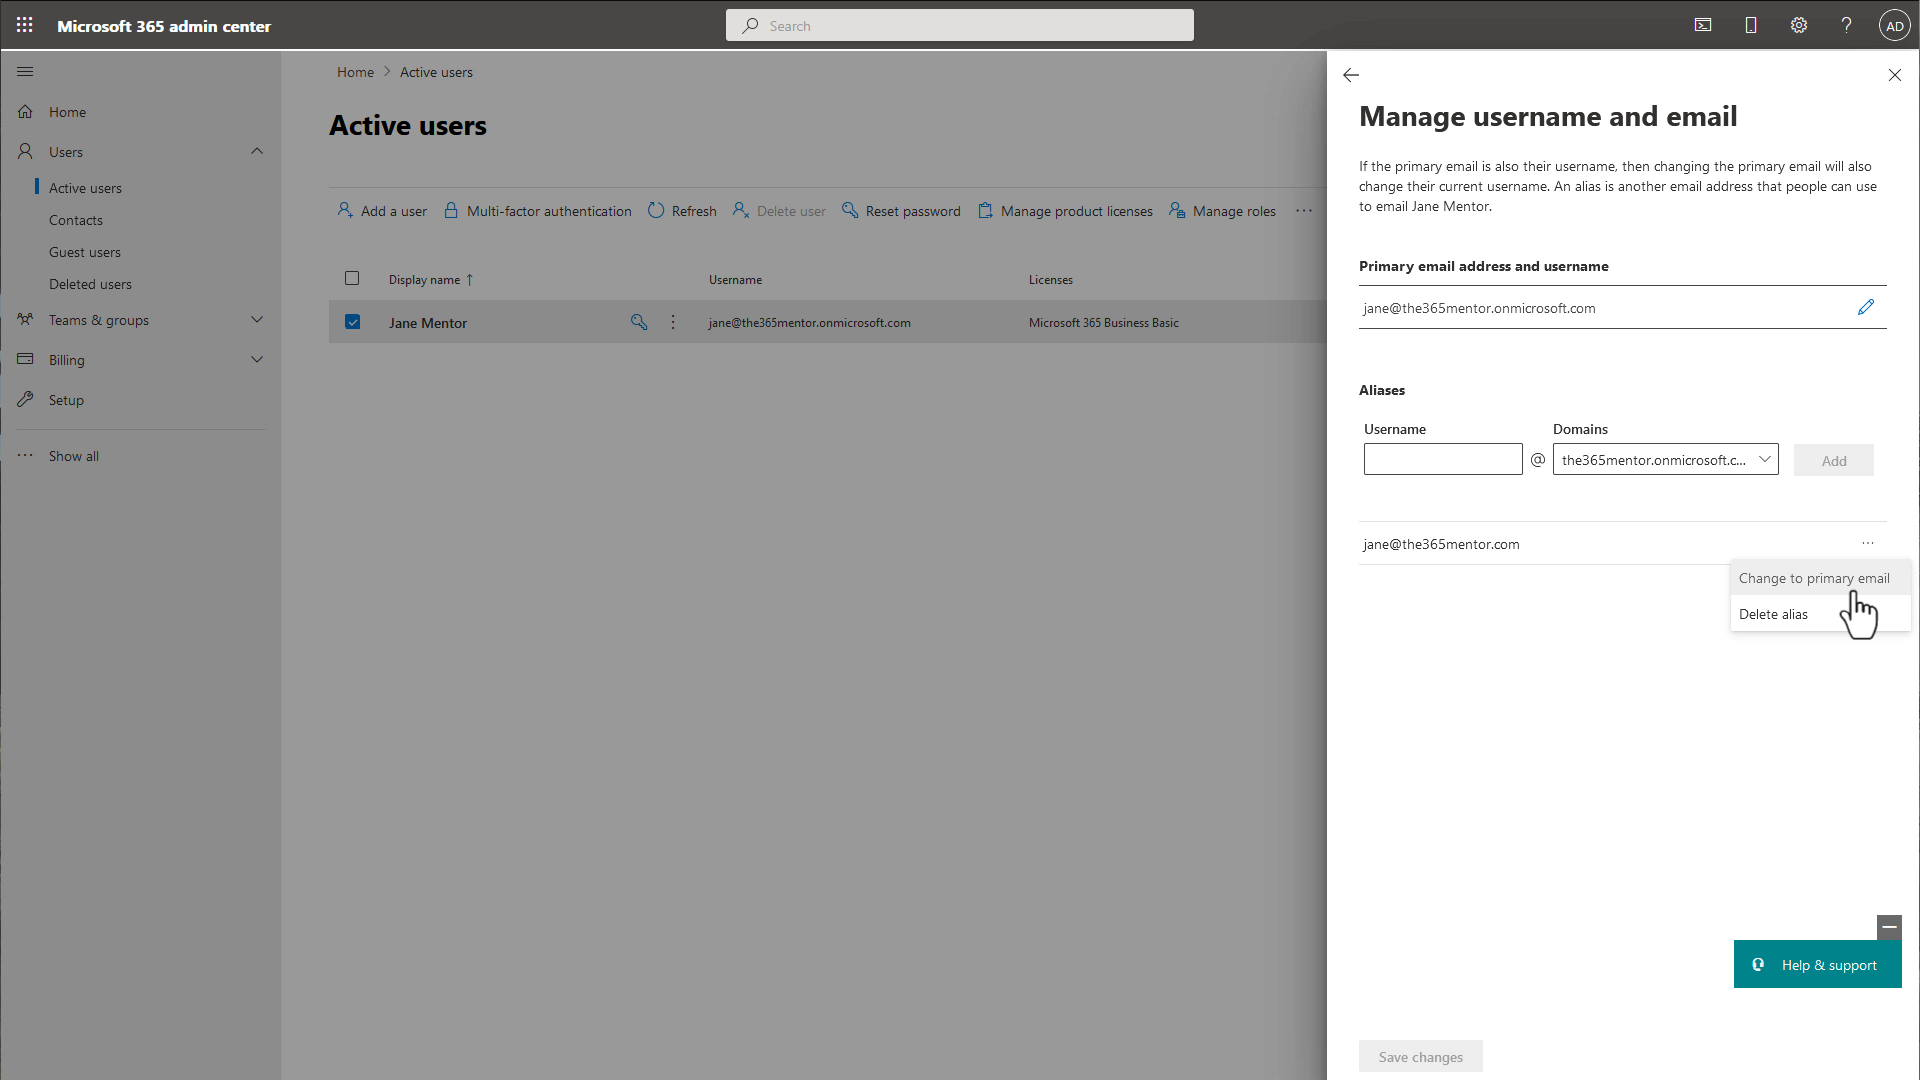
The email address on the page will change (the primary will be shown at the top). When the changes are saved a success message will appear.
Click the "Save changes" button at the bottom.
When the changes are saved a success message will appear.
You should be signed-out automatically, but if not click the "X" button on the top right to close the sidebar.
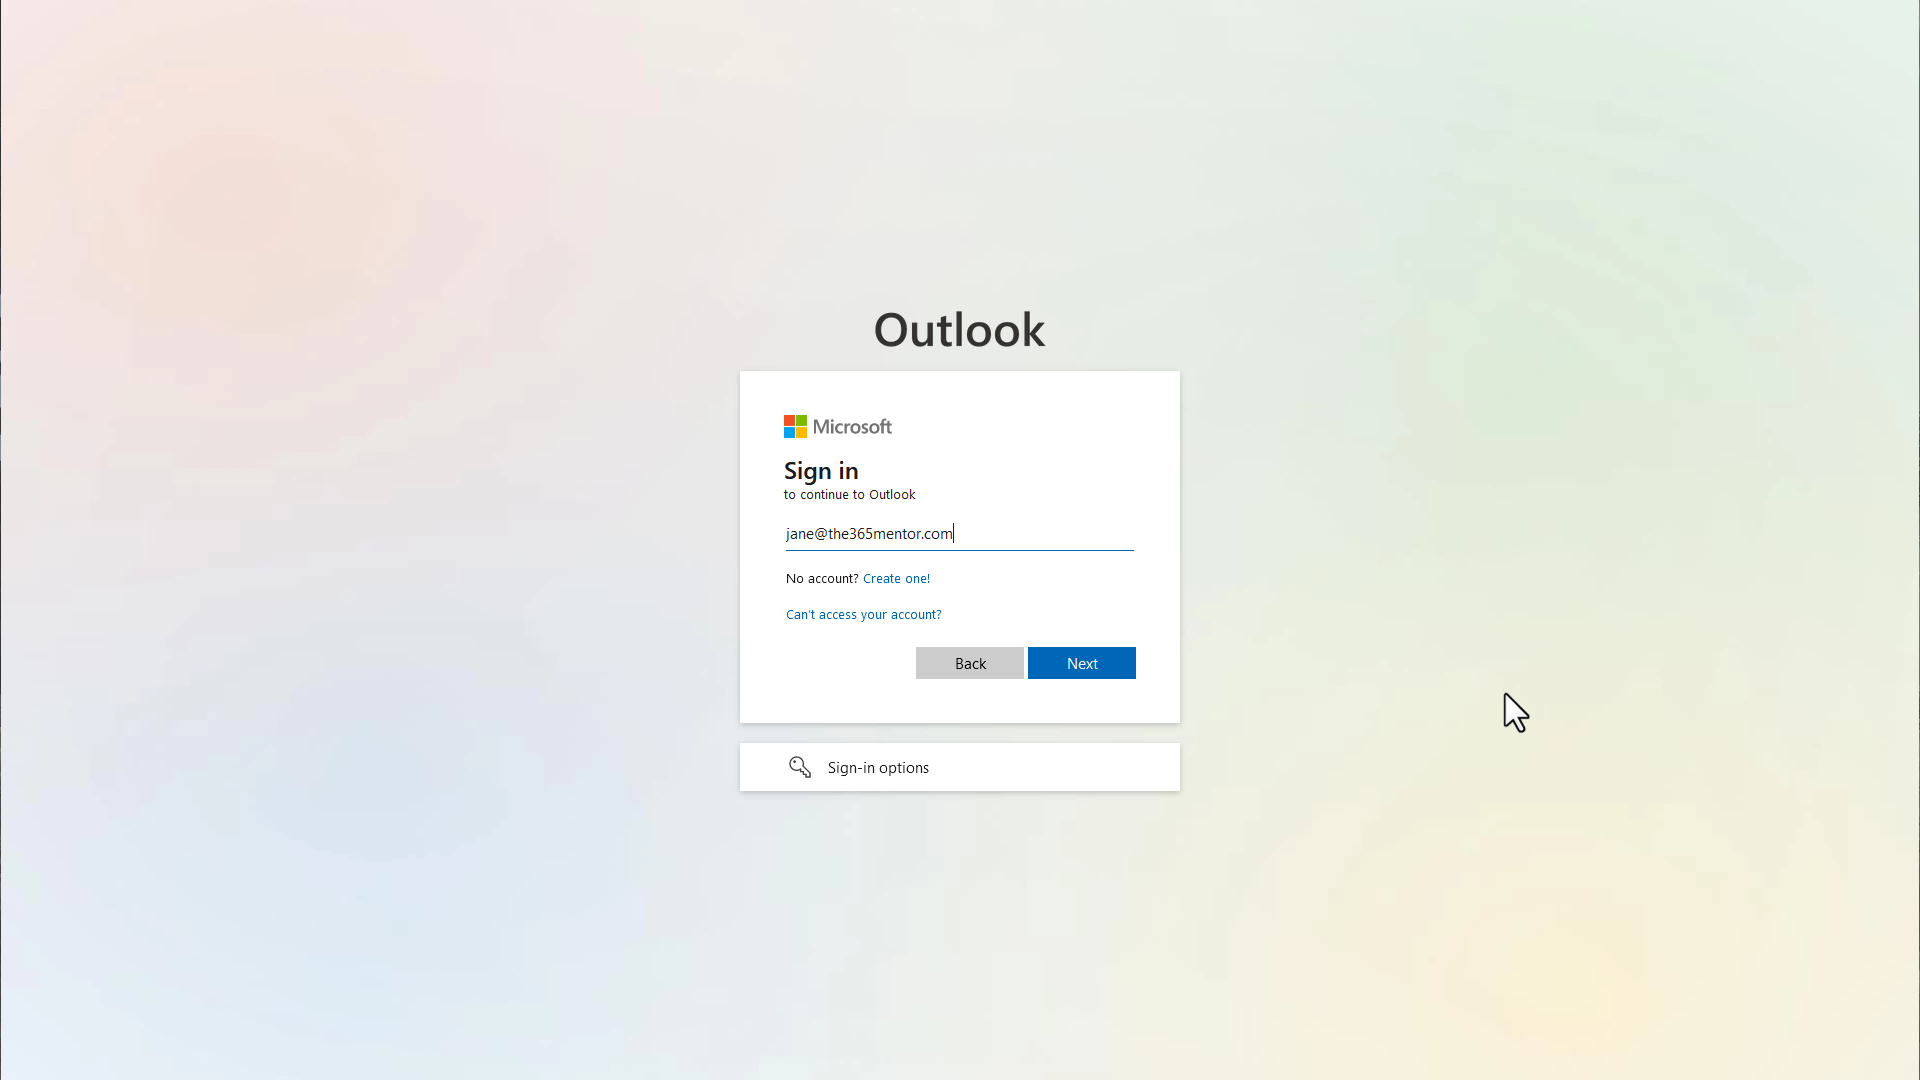
Test your new email
Go to outlook.office.com (we suggest bookmarking that link for easy reference).
Type in your new email address (not the temporary one ending in onmicrosoft.com, but the one with your new domain).
Click the "Next" button.
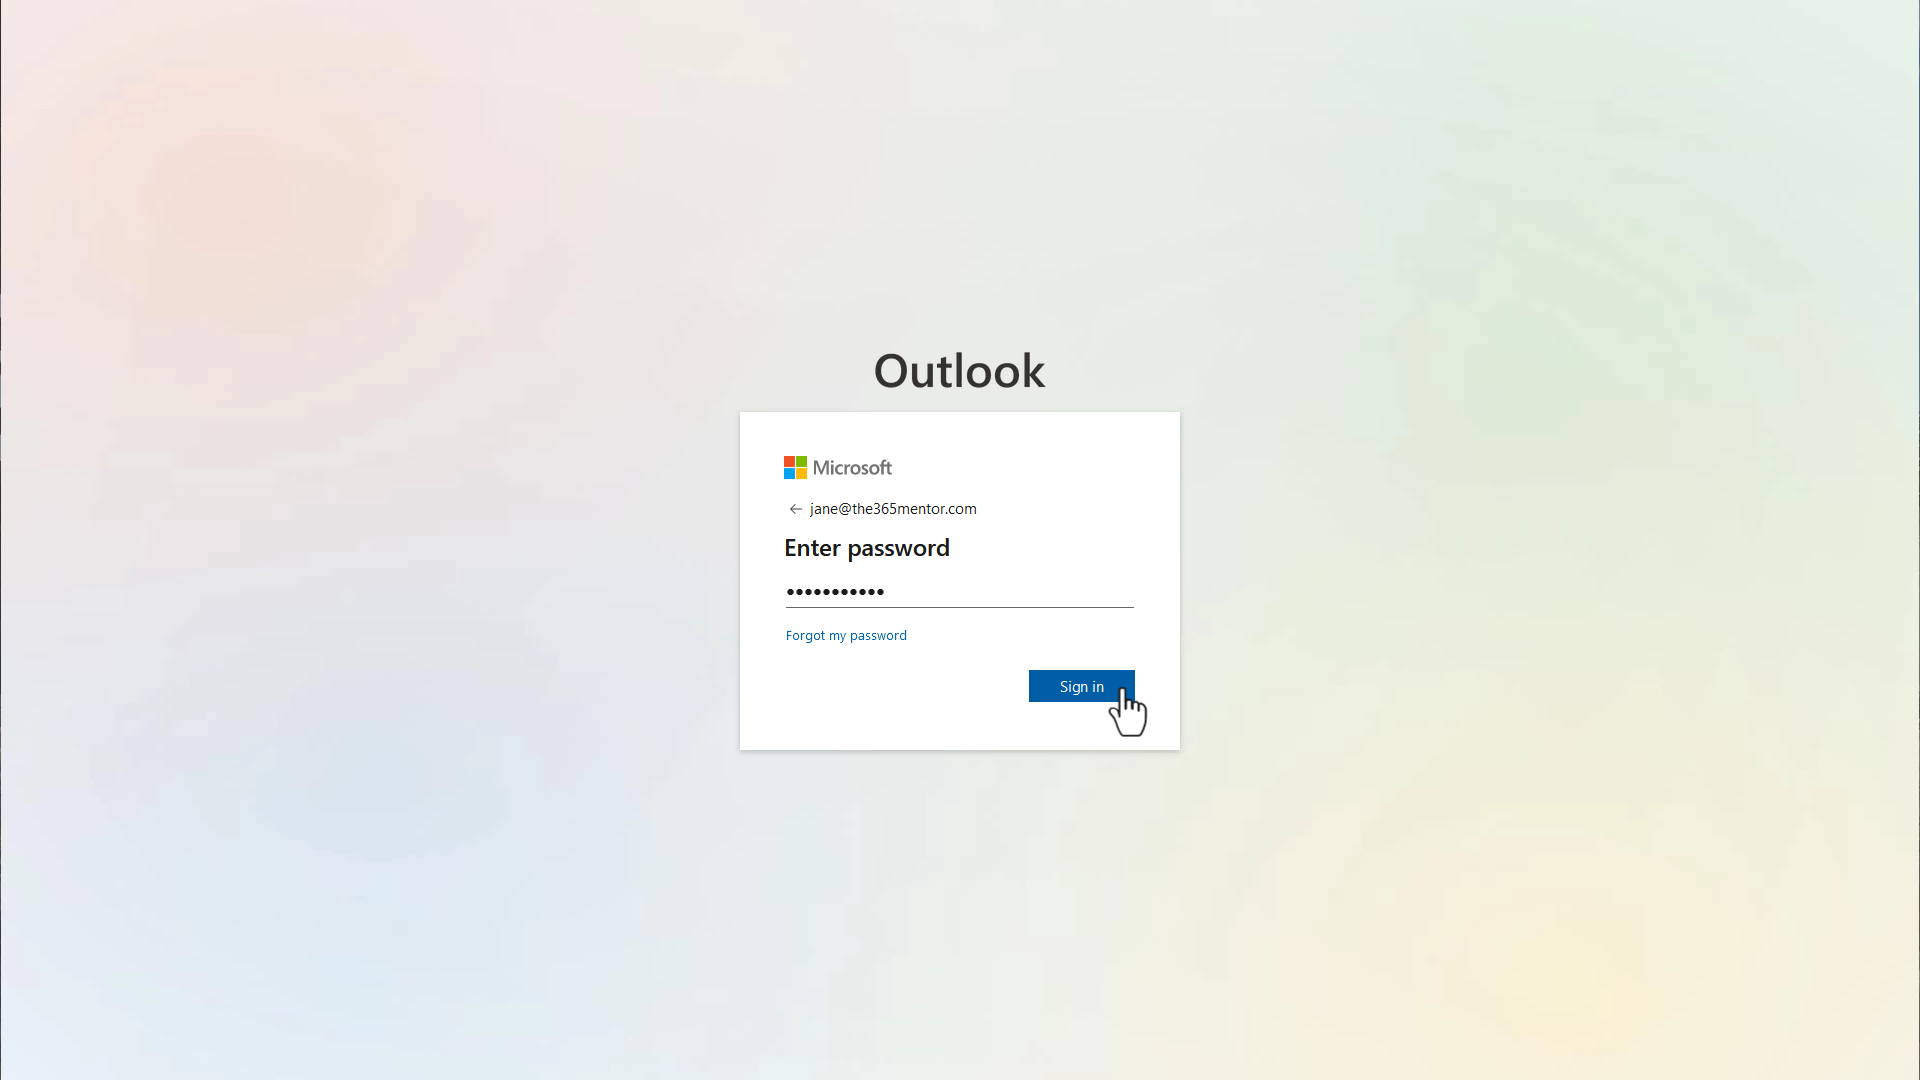
Type in the password you chose above.
Click the "Next" button.
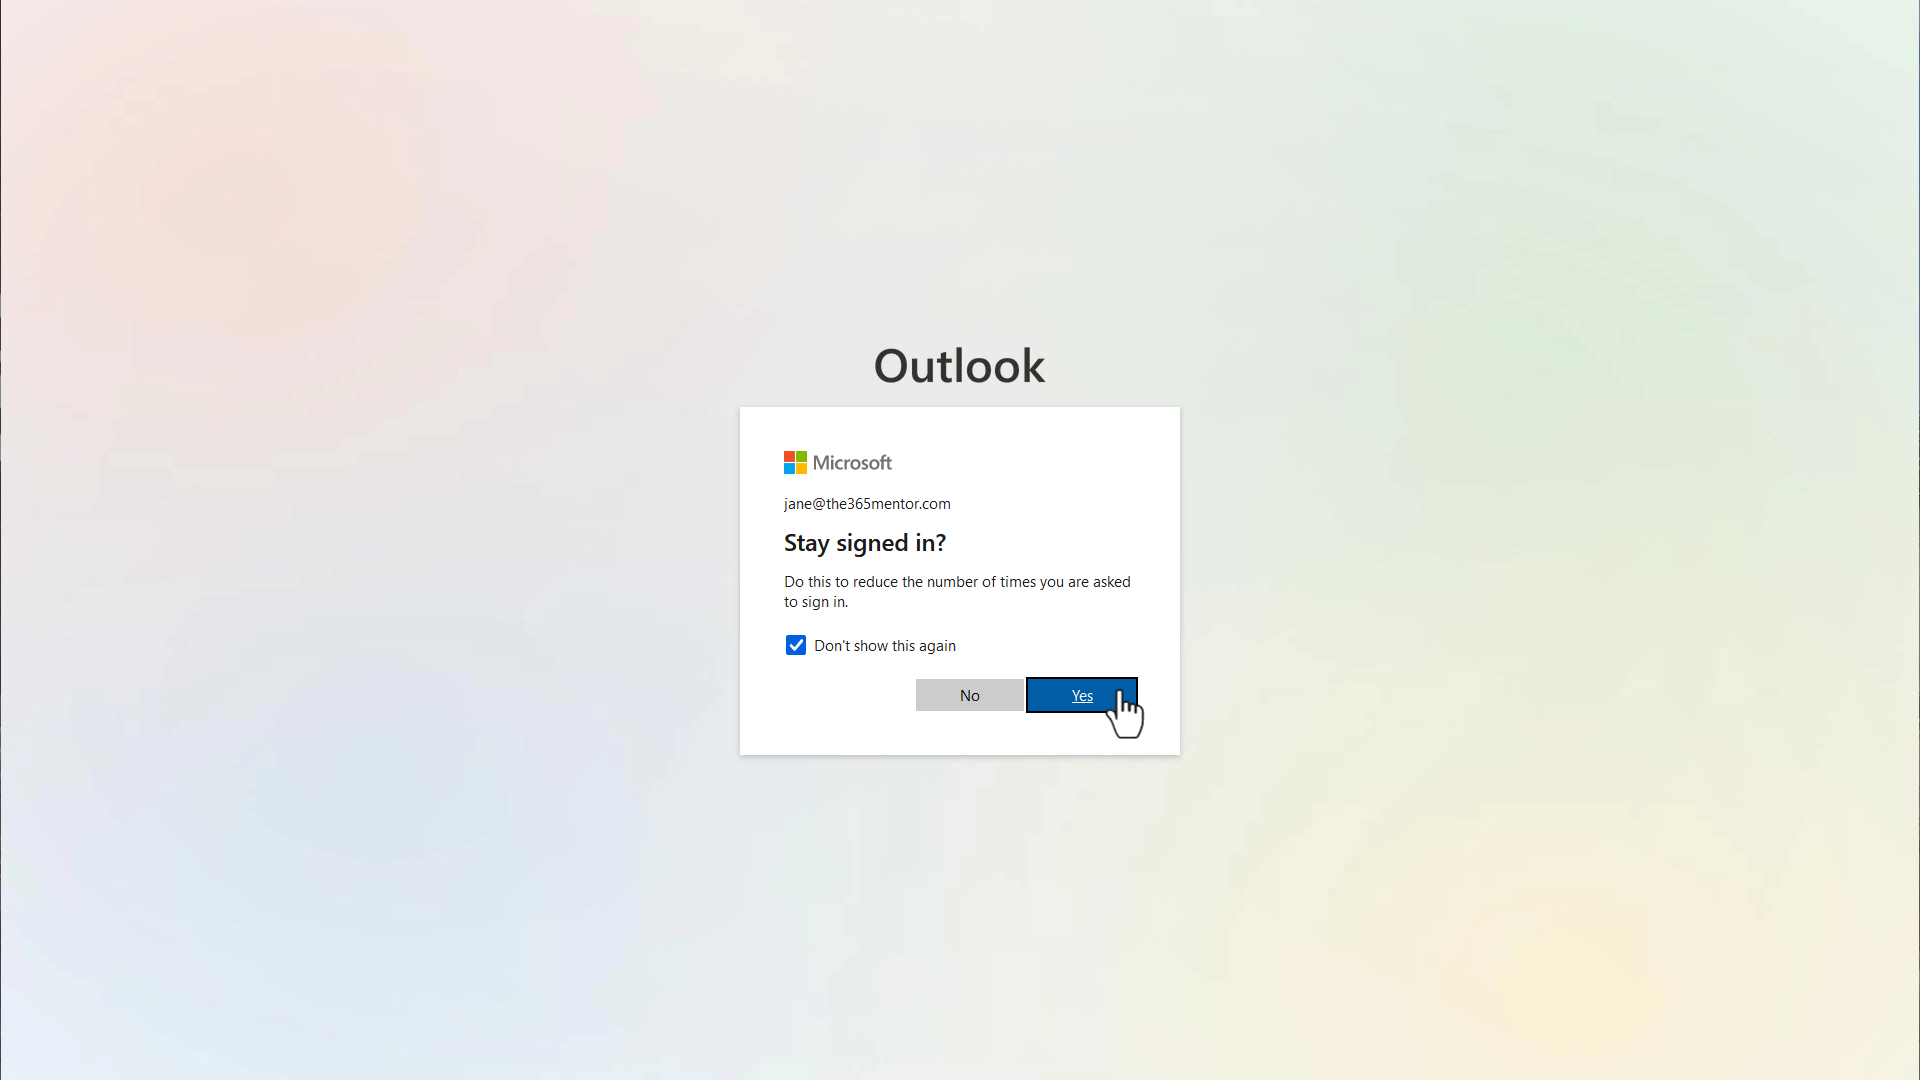
Next it will ask you if you want to be remembered.
If you are on your private computer, check the box "Don't show again" then click the "Yes" button.
If you are NOT on your private (a public, library, a friend's computer), then click the "No" button.
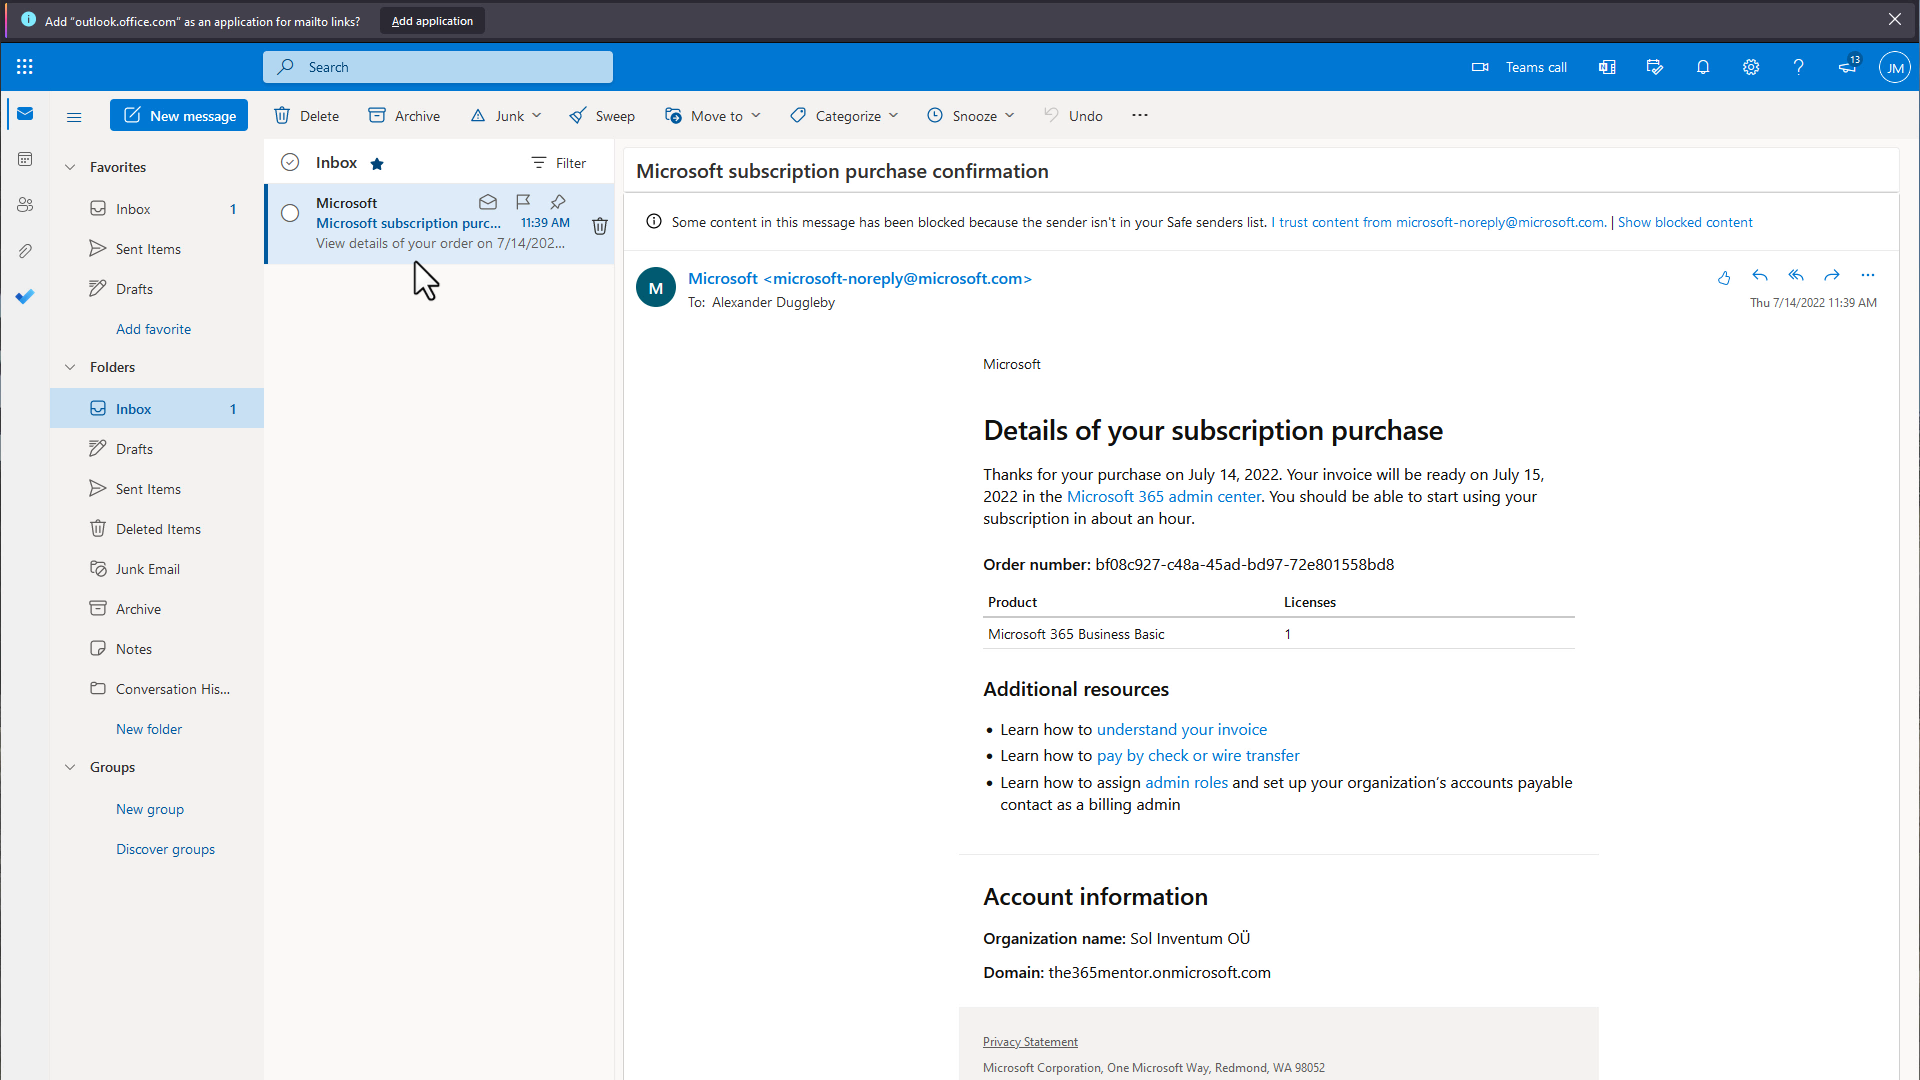
Now your email is ready to use. You are logged-in to Outlook on the Web and can see your first message from Microsoft containing your purchased services.
Congratulations!
What's next?
Next you should add a website to Microsoft 365 and give your business a professional online presence. This won't take long with SimpleWebsite365.
If you want to setup your new business email on your mobile device, simply search for "Outlook" on your phone's app store (iPhone or Android/Google Playstore).